
 Ranno Raamets
So you want to make a Cobbleverse Minecraft server and play with friends, but don't know where to start? There's no official server pack: no one-click installer or no pre-bundled download option. You have to manually install Fabric, copy mods from your client, and write a startup script.
This guide walks you through both: the easy and the hard method to make your own Cobbleverse Minecraft server.
Before you get started
Hosting a modded server on your own PC is free but comes with three trade-offs worth knowing up front.
- It's only online while your PC is on (oftentimes not 24/7)
- Cobbleverse needs 6–8GB of RAM plus a good CPU, and that's before you've joined yourself
- Letting friends join requires opening a router port, which can expose your network if you're not careful
None of this is a dealbreaker, but it's worth knowing now rather than mid-setup.
Cobbleverse server hosting
If that sounds like more than you want to manage, using a Minecraft hosting provider skips all three. If you haven't already, purchase a server with WiseHosting to get started, then follow the instructions:
- Head to your WiseHosting game panel and locate the Version tab
- Choose Modpacks and select CurseForge from the dropdown filter
- Search for Cobbleverse and click Install
- Click Start to start your server
- Copy the IP and join the world
Your server is live in under two minutes, stays online 24/7, and never touches your home network.
If you still prefer to set up a Cobbleverse server yourself, keep reading.
1. Install Cobbleverse on your client
Because there is no standalone Cobbleverse server pack, the client install is the starting point for everything. You need it installed locally before you can set up the server.
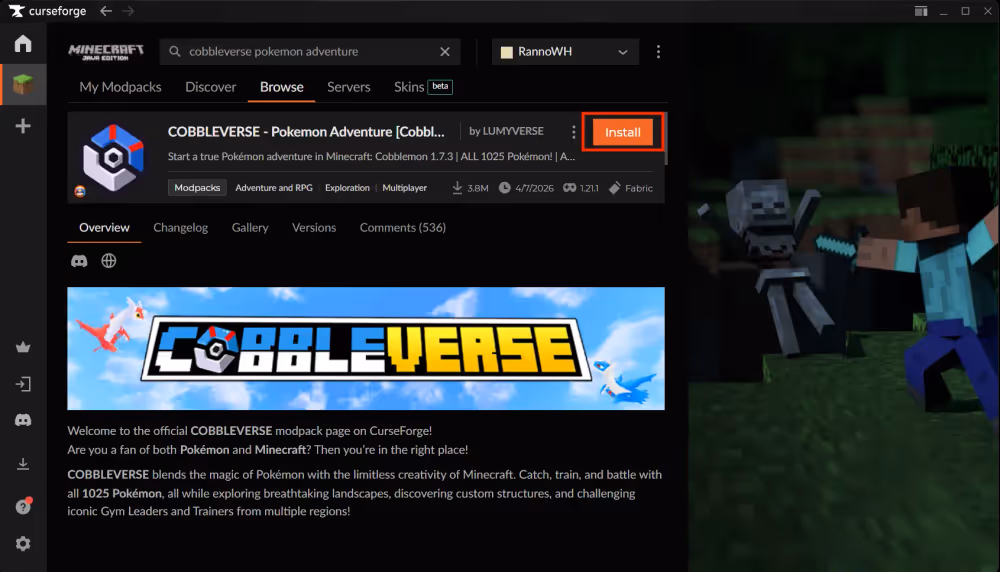
Use the CurseForge app
Download the CurseForge app if you don't have it. In the app:
- Select Minecraft from the game list
- Go to Browse Modpacks and search for Cobbleverse - Pokemon Adventure
- Click Install on the Cobbleverse - Pokemon Adventure modpack
Once installed, note the exact version number from the badge on the modpack installation on your My Modpacks page. Every player who joins your server needs to be running the same version.
Locate the mods folder
After installation click Play and Launch the game so the necessary files are generated in the modpack folder. Quit the game once it finishes loading.
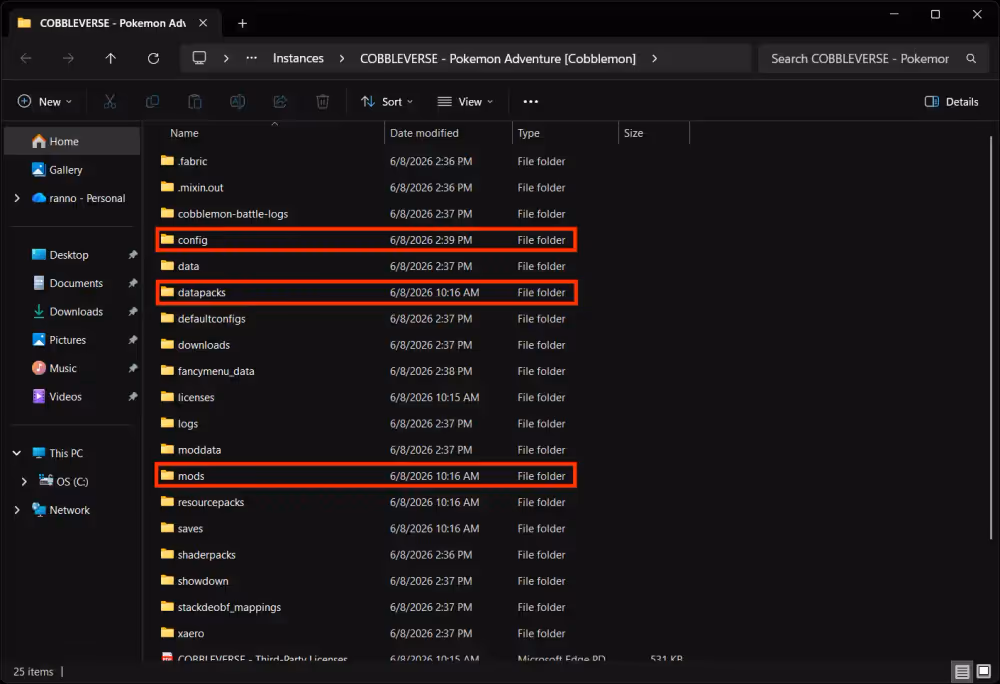
To find where CurseForge installed the modpack on your PC. Open the CurseForge app, go to My Modpacks choose the cobbleverse install and click the three-dot menu next to the play button, and select Open Folder.

Inside you'll find mods, datapacks, and a config folders. You'll need all three in the next steps.
2. Set up the Fabric server
Cobbleverse runs on Fabric. Instead of a self-contained installer like NeoForge or Forge packs, you need to download the Fabric server launcher separately and run it in your server folder.
Java version compatibility
Cobbleverse on Fabric 1.21.1 requires Java 21. If the terminal closes immediately without starting, check your Java version first.
To check:
- Open Command Prompt (press Win + R, type
cmd, press Enter) - Type
java -versionand press Enter - Look for
version 21in the output
If you're on an older version, download Java 21. With multiple Java versions installed, update the start.bat script to point directly to the Java 21 executable path, or simply uninstall any other version.
Create a server folder
You need to create a new folder on your PC to house the server. Name it something clear like Cobbleverse server and create it somewhere easy to find like your desktop.
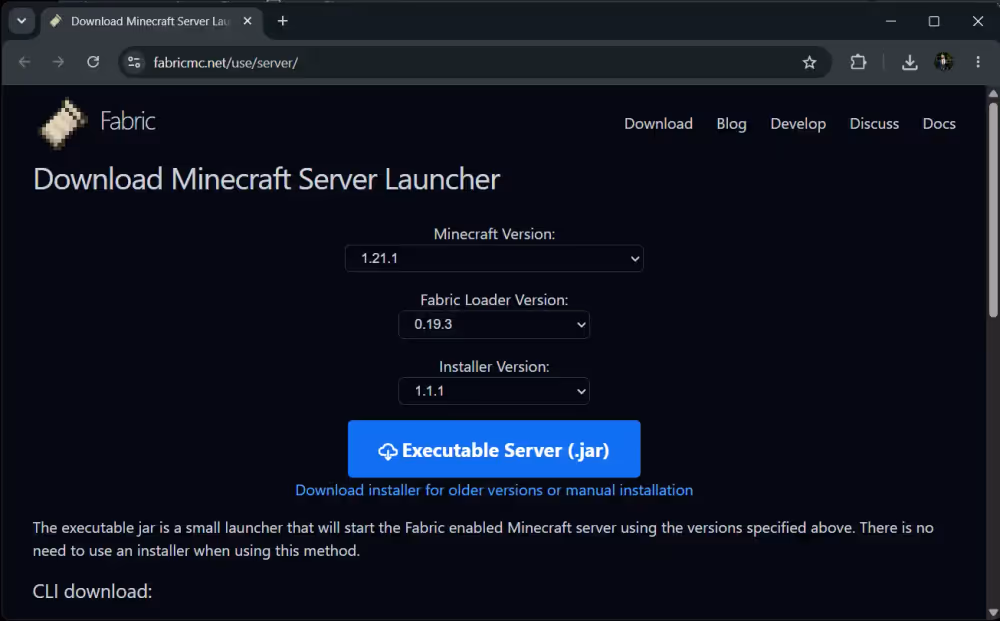
Download the Fabric server launcher
Go to fabricmc.net and download the Fabric server jar. Make sure the Minecraft version is set to 1.21.1 and leave the Fabric Loader and installer version as default. Click Executable server (.jar) to download it and copy it in your Cobbleverse server folder.
Copy mods, datapacks, and config
Copy the entire mods, datapacks, and config folders from your Cobbleverse client install into your server folder.
3. Create a startup script
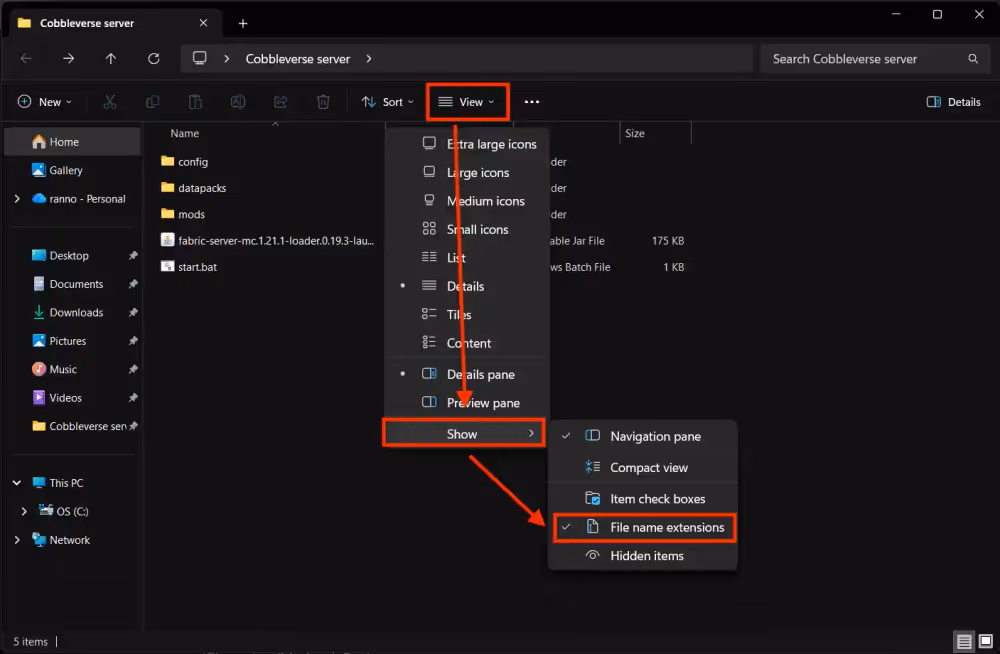
In your server folder, create a new text file save it as start.bat, open it with notepad and paste the following:
java -Xmx6G -jar fabric-server-mc.1.21.1-loader.0.19.3-launcher.1.1.1.jar nogui
To change the file extension from .txt to .bat you need to have show file name extensions enabled.
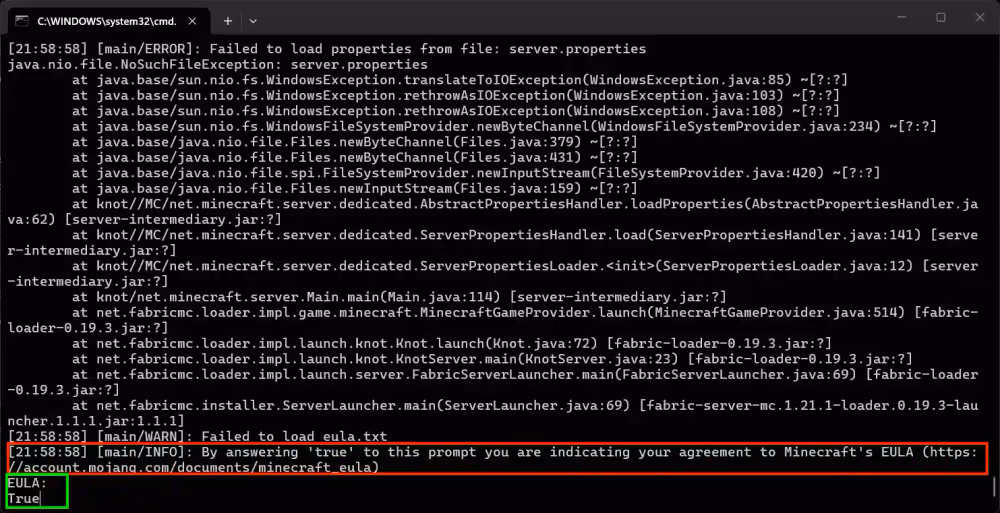
4. Accept the EULA
Double-click start.bat to run the server for the first time. It will generate some files and stop, asking you to accept Minecraft's End User License Agreement. Type in true in the terminal and press enter to continue
5. Allocate correct amount of RAM
Cobbleverse is a mid-weight modpack. Pokémon entity processing scales with player count the same way as any Cobblemon-based modpack, and the custom structures and shaders add to the initial world generation load. Six gigabytes is a comfortable starting point for a small group.
Cobbleverse server RAM allocation:
| Players | Recommended RAM |
|---|---|
| 1-3 | 6GB |
| 4-6 | 8GB |
| 7+ | 10GB |
Your PC needs memory beyond what the server uses. Windows typically takes 4–6GB on its own. On a 16GB PC, 8GB for the server is a recommended max.
Playing on the same PC you're hosting from means factoring in the client's RAM usage on top of the server's. If the system can't handle both comfortably, consider using a Minecraft hosting provider so your PC only needs to run the client.
-Xmx6G .6. Start the server and connect locally
Launch the server
Double-click start.bat. The terminal loads through all the mods. A clean startup looks like this:
[Server thread/INFO]: Done (Xs)! For help, type "help"
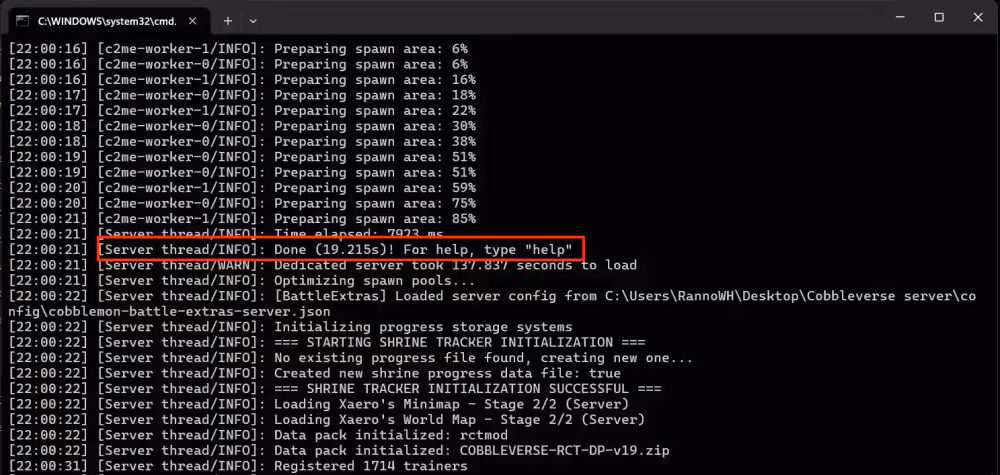
Startup time: The first boot takes longer while the server generates initial world data. Three to five minutes is normal.
To stop the server: Type stop in the terminal and press Enter. This saves the world and shuts down cleanly. Closing the terminal window directly risks world corruption on the next launch.
Connect via localhost
Open Minecraft through the CurseForge app, go to Multiplayer, and click Add Server. Set the Server Address to localhost and click Done.
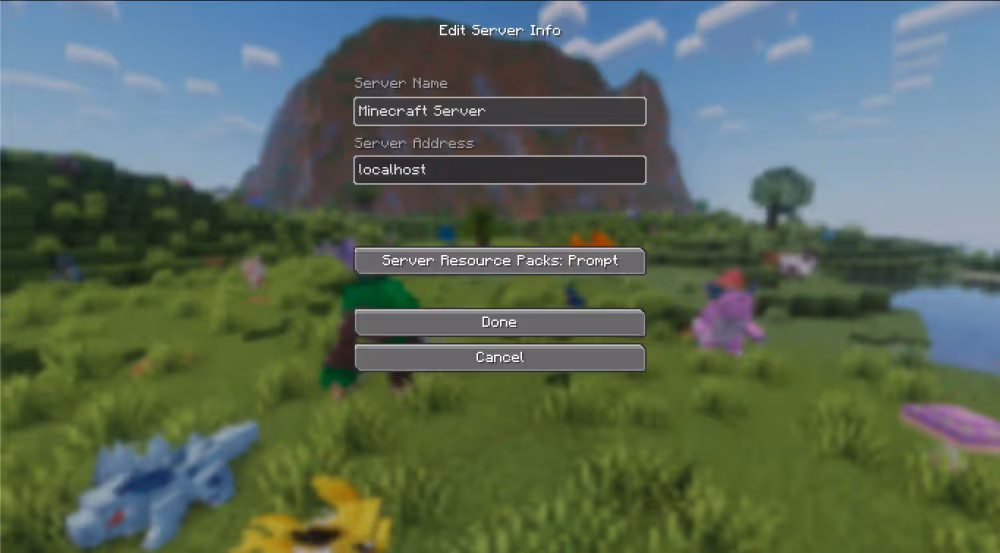
A successful connection means your Cobbleverse server is running locally.
7. Keep the server up to date
Because there is no official server pack, updating the server when Cobbleverse releases a new version requires a few manual steps each time:
- Update the modpack in the CurseForge app
- Copy the updated mods and config folders into your server folder, replacing the old ones
- Remind all players to update their client before reconnecting
8. Set up port-forwarding
Your server is currently local network only. To let friends join from outside, you need to open the port Minecraft runs on.
What is port forwarding?
Your router blocks incoming connections by default. Port forwarding creates a rule that routes traffic on a specific port directly to your PC. Minecraft Java Edition uses port 25565 by default, which can be changed in server.properties under server-port if needed.
How to forward port 25565
The steps vary by router but follow the same general steps explained in this video:
portforward.com has router-specific walkthroughs for almost every model. Search yours there if the steps don't match what you're seeing.
Find your IP
Search "what's my IP" in Google to get your public IP address. Add the minecraft port to your public IP and Share it in this format:
123.45.67.89:25565
Final thoughts
Cobbleverse takes more work to self-host than most modpacks because of the missing official server pack. The main things to get right are the Fabric version, Java 21, and enough RAM for Pokémon entity processing. Get those sorted and the server runs well.