

 Ranno Raamets
Running Cobblemon with friends requires starting a server. The two things that catch most people off guard are version mismatches between the client and server, and underestimating how much RAM Pokémon entity processing needs.
1. Download the Cobblemon server pack from CurseForge
If you don't already have the CurseForge app, it's worth downloading it before anything else. The CurseForge app is the easiest way to install Cobblemon on both the server and client-side. It handles everything in one place: installing the correct modloader version, keeping mods organised, and making version switching straightforward.
How To Find the Right Server Version
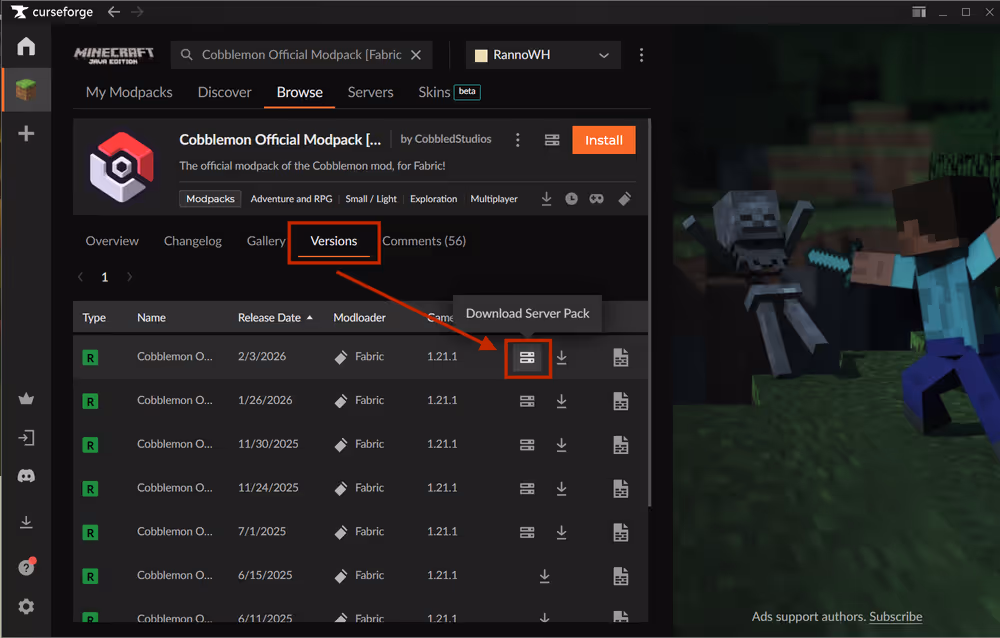
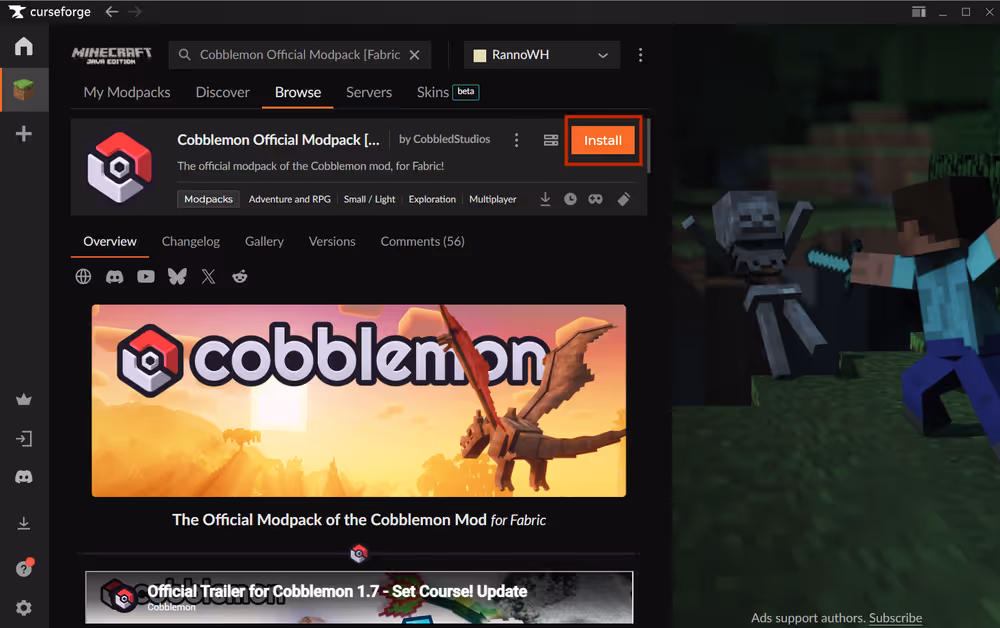
Go to the CurseForge app and search for Cobblemon Official Modpack [Fabric] in the Minecraft modpacks section. Open the modpack page and click the Download server pack icon next to the Install button. This will download the latest version of the Cobblemon server pack.
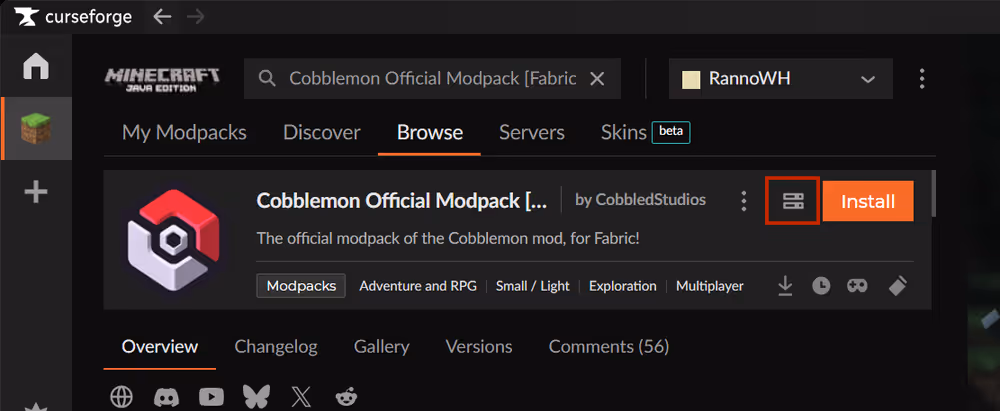
To download a specific version to match an existing world, go to the Versions tab, and choose the one your world is running on. For a new Cobblemon server, stick to the latest Release version. Note down the exact version you choose, as your friends will need to match it precisely.
2. Install your Cobblemon server
Unzip and run the installer
Extract the downloaded .zip to your desktop or a dedicated folder. Inside you'll find a start file along with a handful of other files and folders.
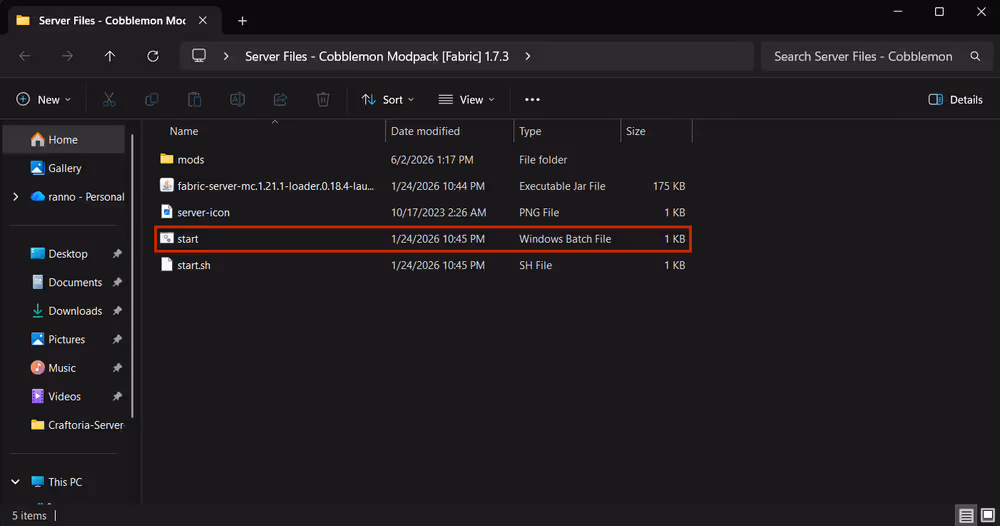
Double-click start to install the Cobblemon server pack. A terminal window will open and begin downloading Fabric, and all required mods and files for the server. This process can take several minutes depending on your connection speed — let it run until it stops.
Accept the EULA
Once the initial download completes, the terminal will stop and ask you to accept Minecraft's End User License Agreement.
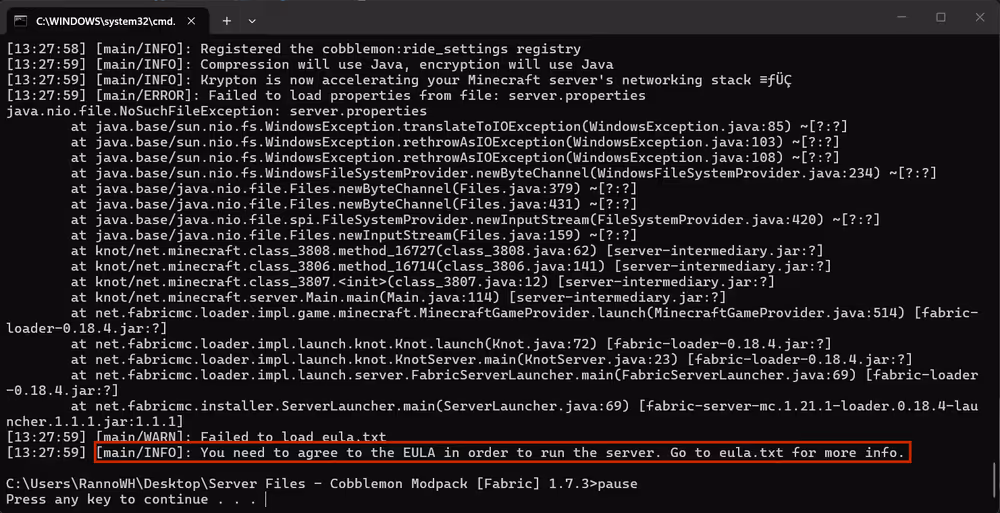
Go back to the server folder and you'll see some files and folders have been added to the folder. Open the eula file in a text editor and change "eula=false" to "eula=true" save the file and the Cobblemon server pack is installed.
Start the server by Double-clicking start again.

3. Install the Cobblemon modpack on your client
Use the CurseForge app
Each player who wants to join the server needs Cobblemon installed on their own Minecraft client. The easiest way to install the modpack is through the CurseForge app:
- Open the CurseForge app
- Select Minecraft from the game list
- Go to Browse Modpacks and search for Cobblemon Official Modpack [Fabric]
- Click Install
Once installed, launch Cobblemon from the CurseForge app — it will automatically use the correct version of Fabric and load all the mods.
Match client and server versions
Client and server versions need to be identical. If they're not, players will get a connection error that looks like this:
Connecting to server failed.
Mods that are missing or have version differences:
[list of mismatched mods]
To check your client's current Cobblemon version in CurseForge, click on the modpack card on the My Modpacks page. Click Content and in the Mods tab look at the cobblemon mod version.
To change it, click Cobblemon mod, go to Versions, then either Install latest version, or select the version that matches the one running on your server.
4. How much RAM does a Cobblemon server need?
Cobblemon is one of the lighter modpacks available, but Pokémon entity processing makes RAM usage scale faster with player count than a typical adventure pack. The mod spawns several Pokémon per player within the surrounding area. On a server with ten active players, that can mean hundreds of entities ticking every game tick. For a small friend group, 6GB is a solid starting point.
Cobblemon server RAM allocation:
| Players | Minimum RAM | Recommended RAM |
|---|---|---|
| 1-2 | 4GB | 6GB |
| 3-6 | 6GB | 8GB |
| 7-15 | 8GB | 10+GB |
The minimums above will get the server running but expect lag in areas with lots of active Pokémon spawns. The recommended RAM gives the server enough headroom to handle entity processing without performance dips.
Keep in mind the host machine needs memory beyond what the server uses. Windows alone typically consumes 4–6GB, so on a 16GB PC, 8GB is about the practical ceiling for the server.
Playing on the same machine you're hosting from adds the client's RAM usage on top of everything else. If your PC doesn't have enough RAM, consider a Minecraft server hosting provider so your machine only needs to run the client.
Allocate the right amount of RAM
By default, the server startup script may not allocate enough RAM for a smooth Cobblemon experience. To increase it, open server_start.bat (or user_jvm_args.txt if present) in a text editor and find the line containing -Xmx. This controls the maximum RAM the server can use.
Change it to match your target allocation. For example, to allocate 8GB:
-Xmx8G -Xms4G
How To Fix Wrong Java Version
If the terminal closes immediately after you run server_start.bat without doing anything, Java version mismatch is almost always the cause. Cobblemon Fabric requires Java 21 specifically.
To check which version is running:
- Open Command Prompt (press
Win + R, typecmd, press Enter) - Type
java -versionand press Enter - The output should say
openjdk version "21.x.x"or similar
If it shows a different version, download Java 21. If you have multiple Java versions installed, you may need to edit startserver file to point directly to the Java 21 executable path.
5. Start the server and connect locally
Launch the server
Once the installation is done, the server starts automatically. To start it again later, double-click startserver. The terminal will load through the mods one by one.
A fully successful startup ends with a line that looks like:
[Server thread/INFO]: Done (Xs)! For help, type "help"
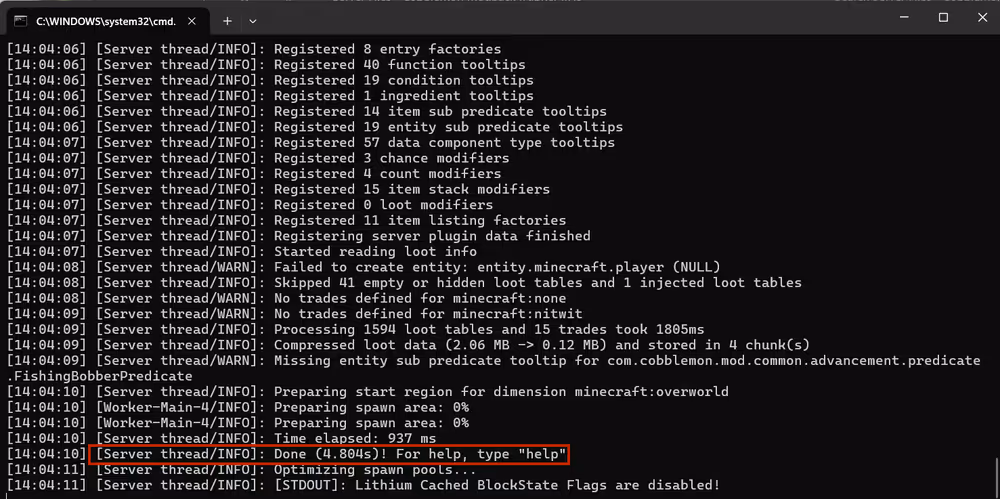
If you see WARN messages, that's usually fine — warnings are common in modded environments. ERROR messages are worth paying attention to, though many are non-fatal. A server that reaches the "Done" line is running and ready to join.
To stop the server: Type stop directly in the terminal and press Enter. This saves the world before shutting down. Closing the terminal window without stopping the server first could corrupt the world or create chunk errors on the next launch.
Connect via localhost
With the server running, start Minecraft through the CurseForge launcher, go to Multiplayer, and click Add Server. Give it any name you like, and set the Server Address to localhost.
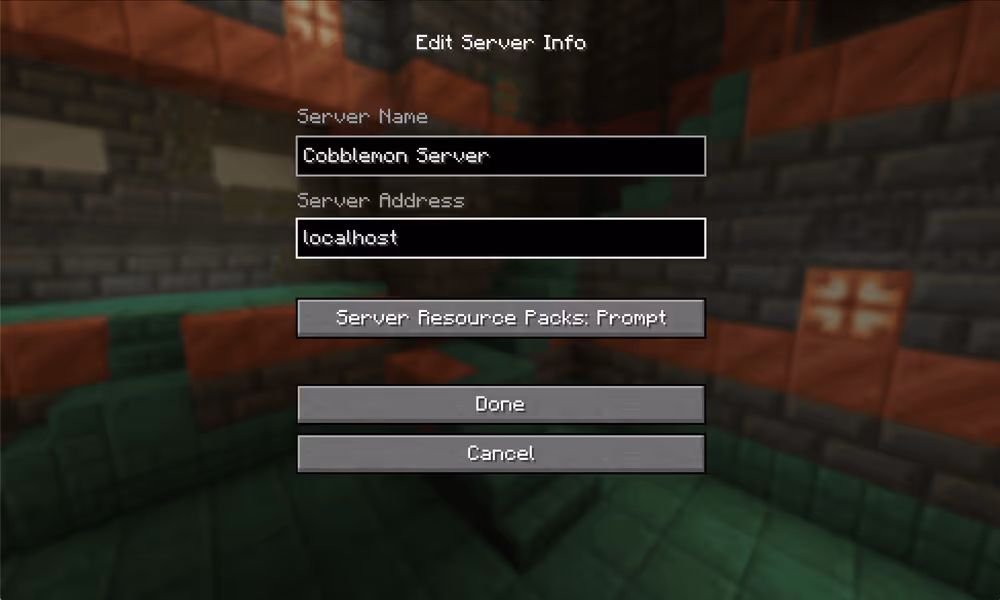
Click Done, then connect. If everything is working, you'll load into the world with Cobblemon active. You're now running a functional Cobblemon server on your local network. But your friends can't join unless they are on the same network as you.
6. Open your server to the internet
Right now, your server is only accessible to devices on the same Wi-Fi network as your PC. To let friends join from anywhere, you need to forward the port that Minecraft runs on.
The exact steps vary by router model, but the general process is explained in this video:
portforward.com has step-by-step guides for almost every router model — search for your specific model there if you get stuck.
Port forwarding didn't work? Some ISPs block port forwarding on residential connections, which makes it impossible without contacting your provider. If portforward.com's guide isn't working and your friends can't join the server, contact your Internet Service Provider and ask them to open port 25565 for your connection.
How to find your IP?
Searching "what's my IP" in Google, and it will show your public IP. Combine the IP and the port and share it to your friends. Your full server address with your IP and port should look like:
123.45.67.89:25565
Only share this with people you know personally. Your public IP can be used in DDoS attacks or other targeted scams and schemes. If you're running a server for more than a small group of close friends, a Minecraft server host is a safer and more convenient option.
Easiest Option for Cobblemon Server Hosting
Self-hosting works well, but it means keeping your PC on whenever anyone wants to play, setting up port forwarding, and handling updates yourself. If that's more than you want to take on, you can choose a dedicated Cobblemon server hosting provider. WiseHosting is built exclusively for Minecraft by Shulkercraft, a YouTube creator with over 2.4m subscribers, and that focus shows up in the details that actually matter for smooth gameplay — your server runs 24/7 in the game panel, the modpack is installed in a few clicks, and you don't touch port forwarding at all.

Final thoughts
Cobblemon is one of the smoother modpacks to get running. The main friction points are Java version, RAM allocation for Pokémon entities, and making sure everyone is on the same modpack version. Get those three right and the rest tends to fall into place.