

 Ranno Raamets
All the Mods 10 is one of the the top modpacks with around 500 mods covering tech, magic, exploration, and a full quest line with a proper endgame. Getting a server running for it takes a bit of setup, and with regular updates, keeping client and server versions in sync is something to stay on top of. This guide covers the full all the mods 10 server setup from download to playing with friends.
Before you get started
Hosting a modded server on your own PC is free but comes with three trade-offs worth knowing up front.
- It's only online while your PC is on.
- A large pack like ATM10 needs 8–12GB of RAM plus a good CPU, and that's before you've joined yourself.
- Letting friends join requires opening a router port, which can expose your network if you're not careful.
None of this is a dealbreaker, but it's worth knowing now rather than mid-setup.
ATM10 Server Hosting
If that sounds like more than you want to manage, using a Minecraft hosting provider skips all three. If you haven’t already, purchase a server with WiseHosting to get started, then follow the instructions:
- Head towards your WiseHosting game panel and locate the "Version" tab
- Choose "Modpacks" and select "CurseForge" from the dropdown filter
- Search for ATM10 and click "Install"
- Click "Start" to start your server
- Copy the IP and join the world
Your server is live in under two minutes, stays online 24/7, and never touches your home network.
If you still prefer to start an ATM10 modpack server on your own PC, then keep reading.
1. Download the All the Mods 10 server pack
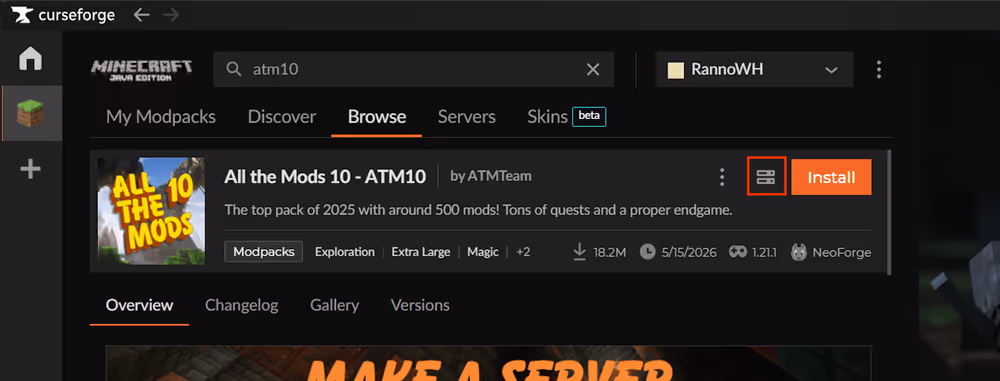
If you don't have the CurseForge app yet, download it first. It takes care of modpack installs, NeoForge versioning, and switching between versions on the client side without manually hunting down files.
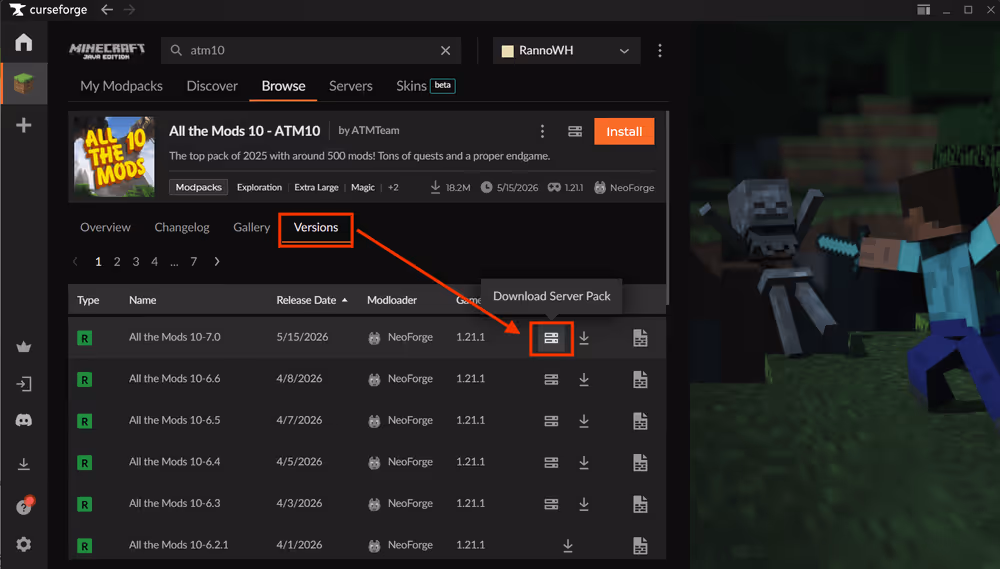
Find the right server version
Go to the CurseForge app and search for ATM10 in the Minecraft modpacks section. Head to the All The Mods 10 page on the CurseForge app and click the Download server pack icon next to the Install button. This will download the latest version of the All the Mods 10 server pack.
ATM10 gets updates regularly, so write down the exact version number before moving on. Every player connecting will need to match it on their client. With a pack this size, a single version mismatch means an error text on connection.
2. Install your ATM10 server
Unzip and run the installer
Extract the downloaded .zip to your server folder. Inside you'll find a startserver file along with server.properties, a mods folder, and several other files and folders.
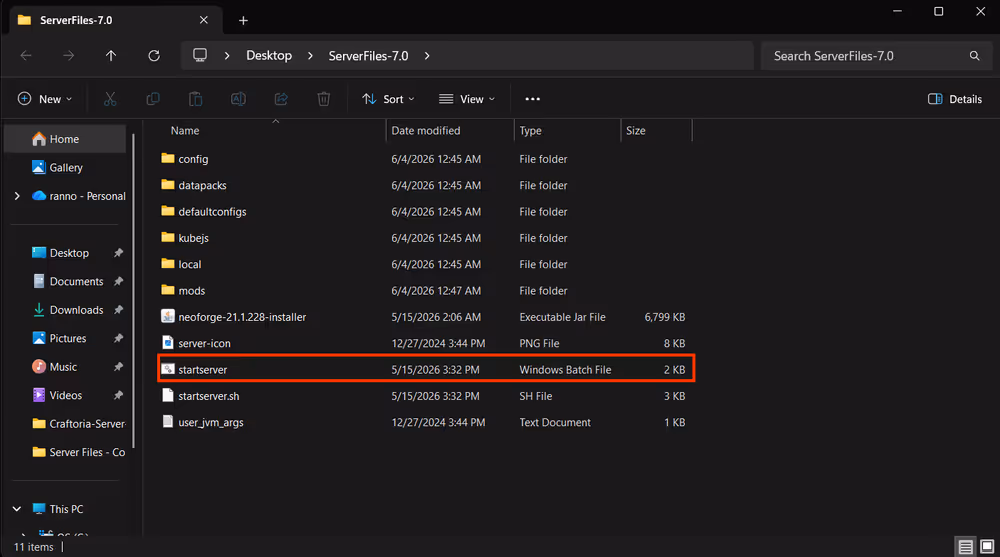
Double-click startserver to begin the installation. A terminal window opens and pulls down NeoForge along with all required libraries. With 500 mods in the pack this takes longer than most, so give it time and leave the terminal running until it finishes on its own.
Leave the terminal open. Closing it mid-download will cut the process short. If it stops before finishing, run startserver again and it will resume from where it left off.
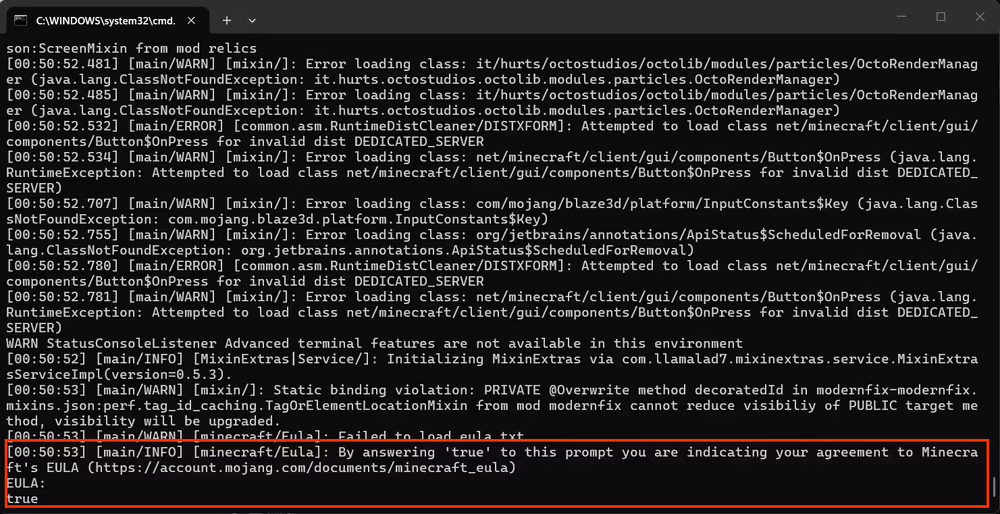
Accept the EULA
Once the download finishes, the terminal stops and asks you to accept Minecraft's End User License Agreement. Type true and press Enter. After accepting, the rest of the setup completes automatically.
Java version compatibility
ATM10 runs on NeoForge for Minecraft 1.21, which requires Java 21. If the terminal closes the moment you run startserver without downloading anything, the wrong Java version is almost certainly the cause.
To check what's installed:
- Open Command Prompt (press Win + R, type
cmd, press Enter) - Type
java -versionand press Enter - Look for
openjdk version "21.x.x"in the output
If a different version shows up, download Java 21. With multiple Java versions installed, you may also need to update the startserver file to point directly to the Java 21 executable path.
3. Install All the Mods 10 on your client
Use the CurseForge app
Each player joining the server needs ATM10 installed on their own machine:
- Open the CurseForge app
- Select Minecraft from the game list
- Search for All the Mods 10 under Browse Modpacks
- Click Install
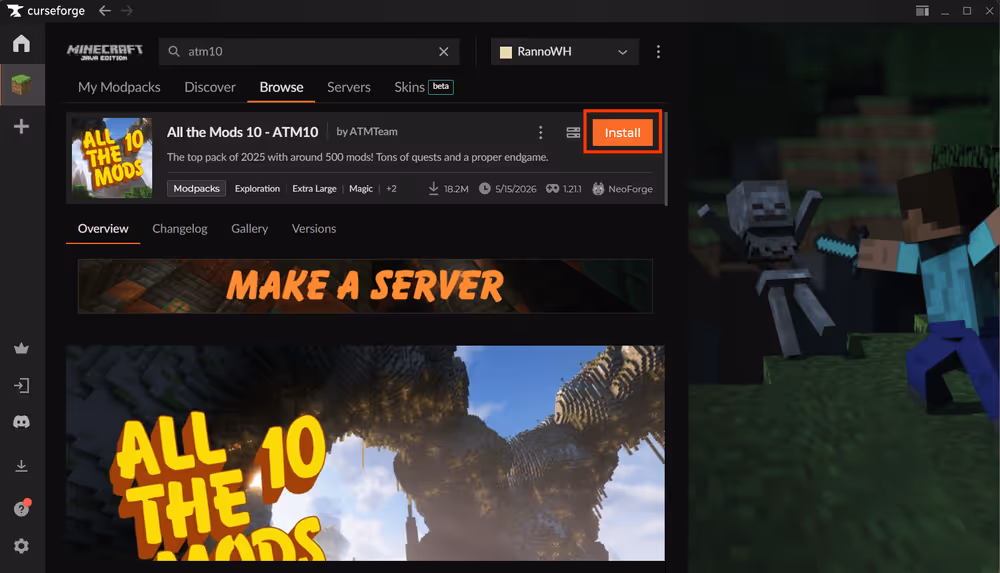
Launching ATM10 through the CurseForge app takes care of loading the correct NeoForge version and all associated mods.
Match client and server versions
Client and server versions need to be identical. With ATM10 updating regularly, it's easy for one player to auto-update and end up out of sync with everyone else. A mismatch produces a connection error like this:
Connecting to server failed.
Mods that are missing or have version differences:
[list of mismatched mods]
To check the client version, look at the badge in the top right corner of the ATM10 card on the My Modpacks page in CurseForge. To change it, click the three-dot menu on the modpack, select Change Version, and choose the version that matches the server.
4. How much RAM for an All the Mods 10 server?
ATM10 is one of the most demanding packs available. Five hundred mods running simultaneously means constant background processing: tech automation, magic systems, custom world generation, and quest logic all running every game tick. Ten gigabytes is the practical starting point for a group server.
All the Mods 10 server RAM allocation:
| Players | Minimum RAM | Recommended RAM |
|---|---|---|
| 1-2 | 8GB | 10GB |
| 3-6 | 10GB | 12GB |
| 7+ | 12GB | 16+GB |
Running at the minimum keeps things online but expect lag during world generation and when multiple players are running automated systems simultaneously. The recommended figures give the JVM enough breathing room to handle those peak loads without slowing down.
Your host machine needs memory on top of the server's allocation. Windows typically uses 4–6GB on its own, so on a 16GB PC, 10GB is about the practical ceiling for the server.
Playing on the same machine you're hosting from means the Minecraft client's RAM usage stacks on top of everything else. ATM10 is not a comfortable dual-host-and-play setup on most home PCs. If your system doesn't have enough headroom for both, All the Mods 10 server hosting through a dedicated provider means your machine only needs to run the client.
Allocate the right amount of RAM
The default RAM in the startup script won't cut it for ATM10. Open the user_jvm_args.txt in a text editor, find the line with -Xmx, and update it to your target. For 10GB:
-Xmx10G -Xms5G
5. Start the server and connect locally
Launch the server
With installation complete, double-click startserver. The terminal loads through all 500 mods one by one. This takes a while, especially on the first boot. A clean startup has this in the terminal, you might need to scroll up:
[Server thread/INFO]: Done (Xs)! For help, type "help"
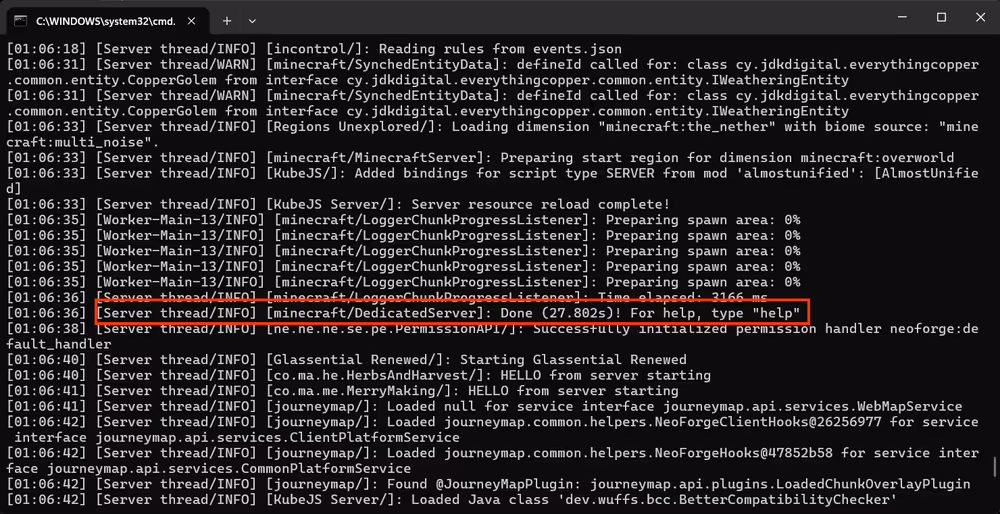
Startup time: The first launch is significantly slower than later ones while NeoForge generates caches for all 500 mods. Five or more minutes on the first boot is normal.
To stop the server: Type stop in the terminal and press Enter. This saves the world and shuts everything down cleanly. Closing the terminal window directly risks world corruption or chunk errors on the next launch.
Backups: The ATM10 server pack does not include a backup mod. Set up a regular backup routine for your world folder, especially before updating to a new version. Losing a long-term world to a corrupted update is painful.
Connect via localhost
Open Minecraft through the CurseForge app, go to Multiplayer, and click Add Server. Set the Server Address to localhost and click Done.
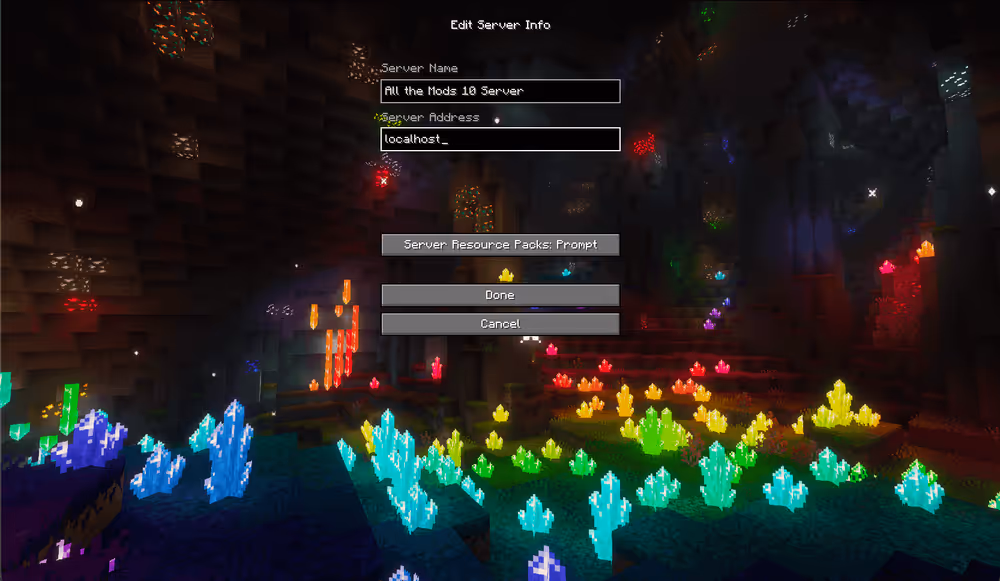
A successful connection means your all the mods 10 server is running locally and ready to play on.
6. Set up port-forwarding
At this stage the server is only reachable by devices on your local network. To let friends join from anywhere, you need to open the port Minecraft runs on.
What is port forwarding?
Your router blocks incoming connections by default. Port forwarding creates a rule that routes traffic on a specific port directly to your PC. Minecraft Java Edition uses port 25565 by default, which can be changed in server.properties under server-port if needed.
How to forward port 25565
The steps vary by router model but follow this video guide:
portforward.com has router-specific walkthroughs for almost every model. Search yours there if the steps don't match what you're seeing.
Still can't connect? Some ISPs block port forwarding on residential connections. If portforward.com's guide isn't working, contact your provider directly and ask them to open port 25565.
Find your IP
Search "what's my IP" in Google to get your public IP address. Share the full server address in this format:
123.45.67.89:25565
Final thoughts
The main things to get right for an all the mods 10 server setup are Java 21, enough RAM for 500 mods, and keeping client and server versions in sync after updates. Get those three sorted and the rest of the process is straightforward. The pack has a great endgame, so it's worth the setup time.