

Why is my Mods tab locked?
Mods only work on modded server types. If your Addons → Mods tab is greyed out with a lock icon, your server is running a type that can't load mods, like Vanilla or Paper.
To unlock it, switch your server to Fabric, Forge, NeoForge, or Arclight. For most servers we recommend Fabric or Forge. Here's how: How To Change Your Minecraft Server Version
Before you get started
Mods are version specific, they will only work on the version of the game they were created for and not any others. A mod created for Forge 1.16.5 will only work on Forge version 1.16.5. If you try to install it on a 1.20.4 server, it either won’t load at all or the server will crash on startup.
Mod dependencies provide a solution for sharing mod contents across multiple other mods. Some mods require you to install other mods in order to run correctly. These are often either specified in the console when trying to start the server up without them, on the mod page itself or could also be found from the Relations tab at the top of the mod's Curseforge page.
How To Install Mods using the Mods Tab?
- Head over to the Game Panel and stop your server.
- Navigate to the Addons → Mods tab and find the mods you'd like to install.
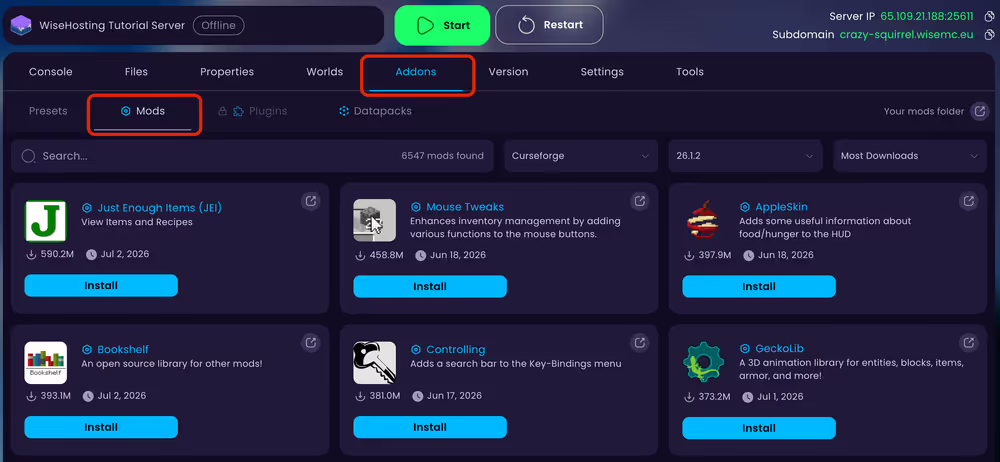
- Start your server and take a look at the server's console to make sure the mod(s) started up correctly.
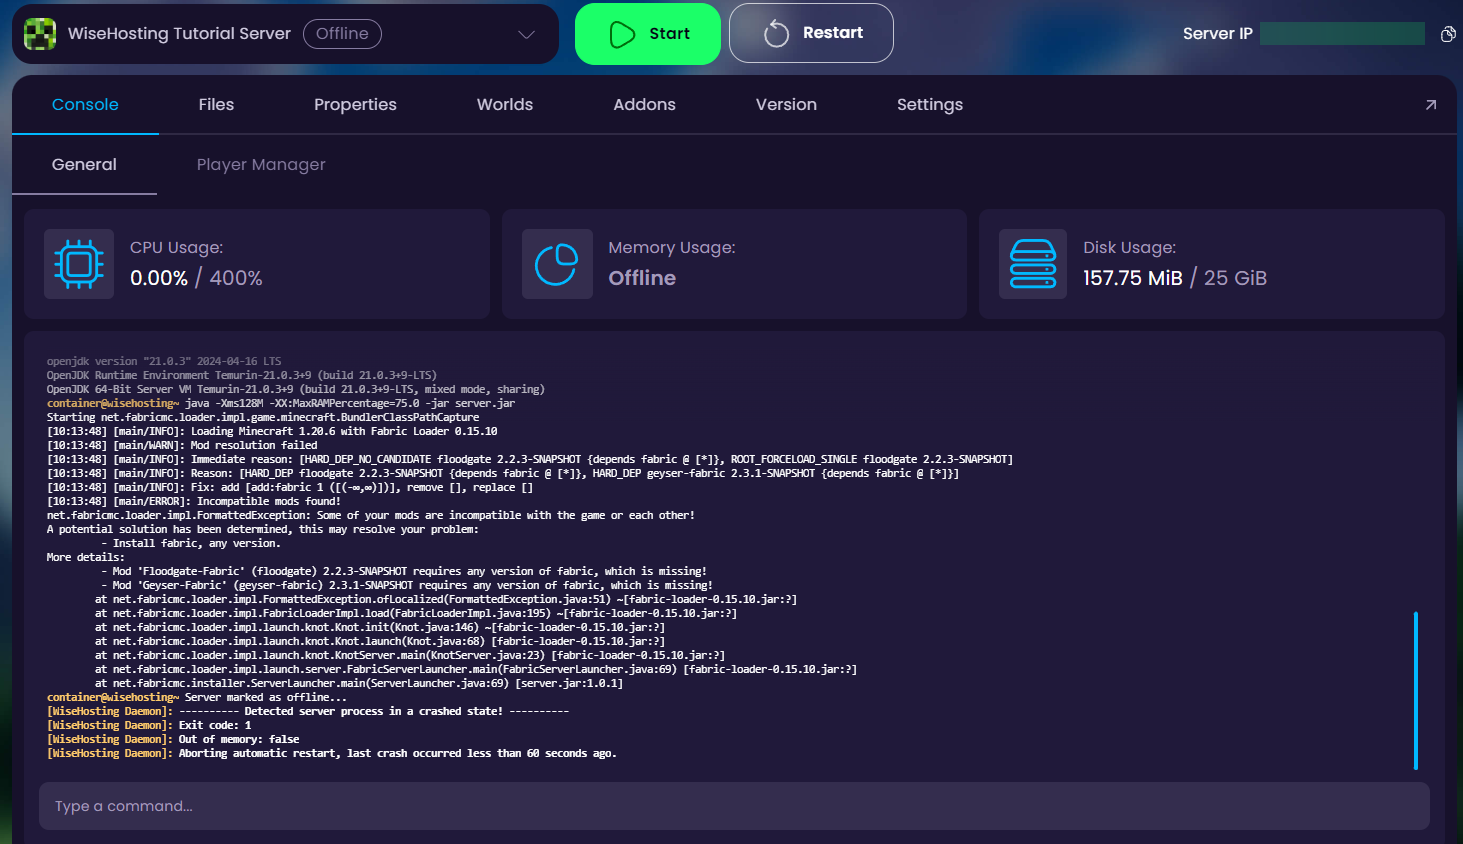
Dependencies are installed automatically when you use the Mods tab, so you shouldn't need to add anything extra.
Do my players need to install the mod too?
It depends on the mod.
Server-side mods (performance, admin tools, world generation) run only on the server. Players don't need to install anything.
Client-side mods (new items, mobs, dimensions) must be installed by every player too, with the same mod version and the same loader as the server, or they can't join.
The mod's page on Modrinth or CurseForge tells you which type it is. If your players need to install mods, send them our guide: How To Install Mods / Modpacks On Your Own PC
How To Install Mods Manually?
- Download the mods you'd like to add to the server from a website like CurseForge or Modrinth.
- Head over to the Game Panel and stop your server.
- Navigate to the Files tab and into the
modsfolder. Upload the downloaded mods there.
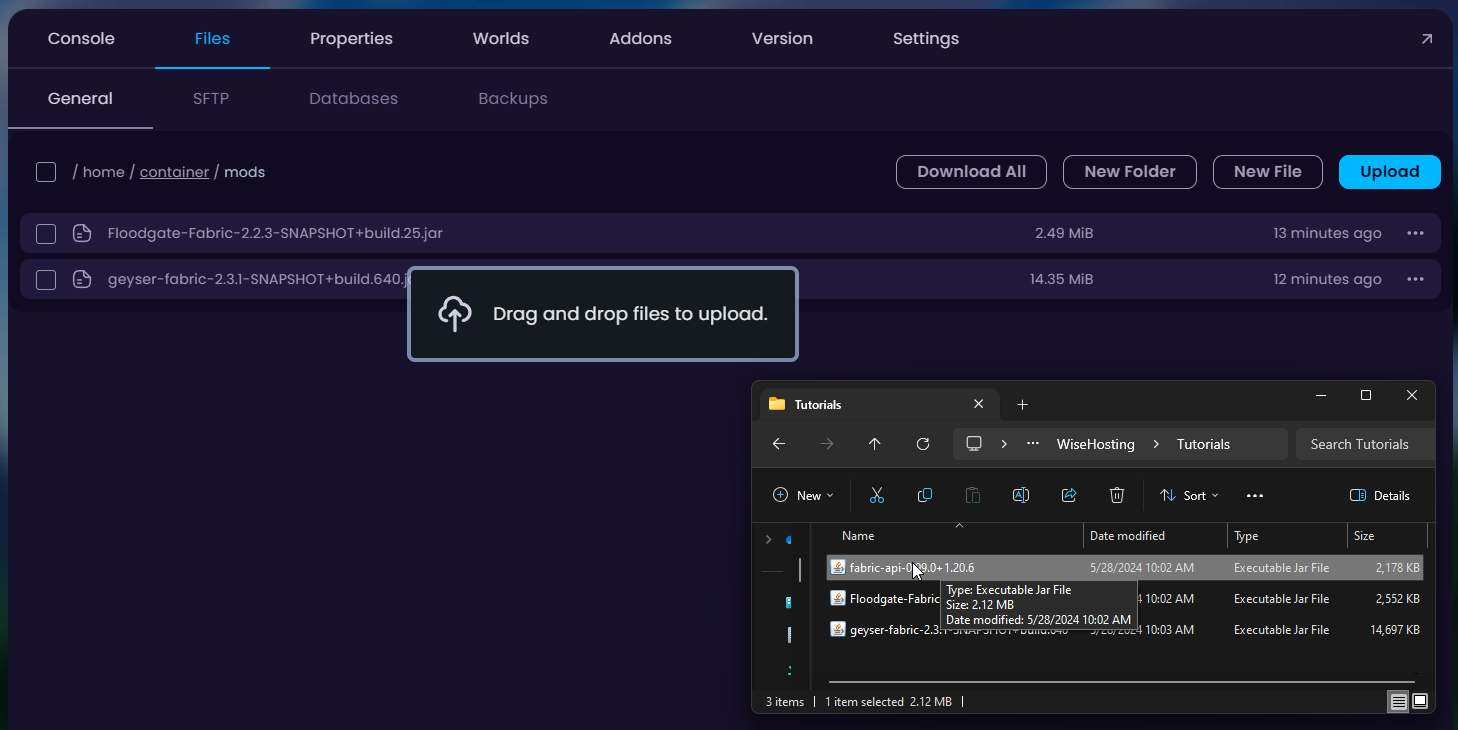
- Start up your server and make sure your mod loads up correctly.
- Download the dependency mod and upload it to the
modsfolder like previously done with the previous mods.


