LuckPerms is a permissions plugin/mod for Minecraft servers. It allows server admins to easily control what features players can use by creating groups and assigning permissions.
LuckPerms is most commonly used used on Paper/Spigot servers as a plugin, but it also supports modded game versions like Fabric or Forge.
If you have Fabric, Forge or other mod loader installed to your server then make sure to install the appropriate mod version of LuckPerms from Addons → Mods to your server instead.
How to Install LuckPerms to Your Server?
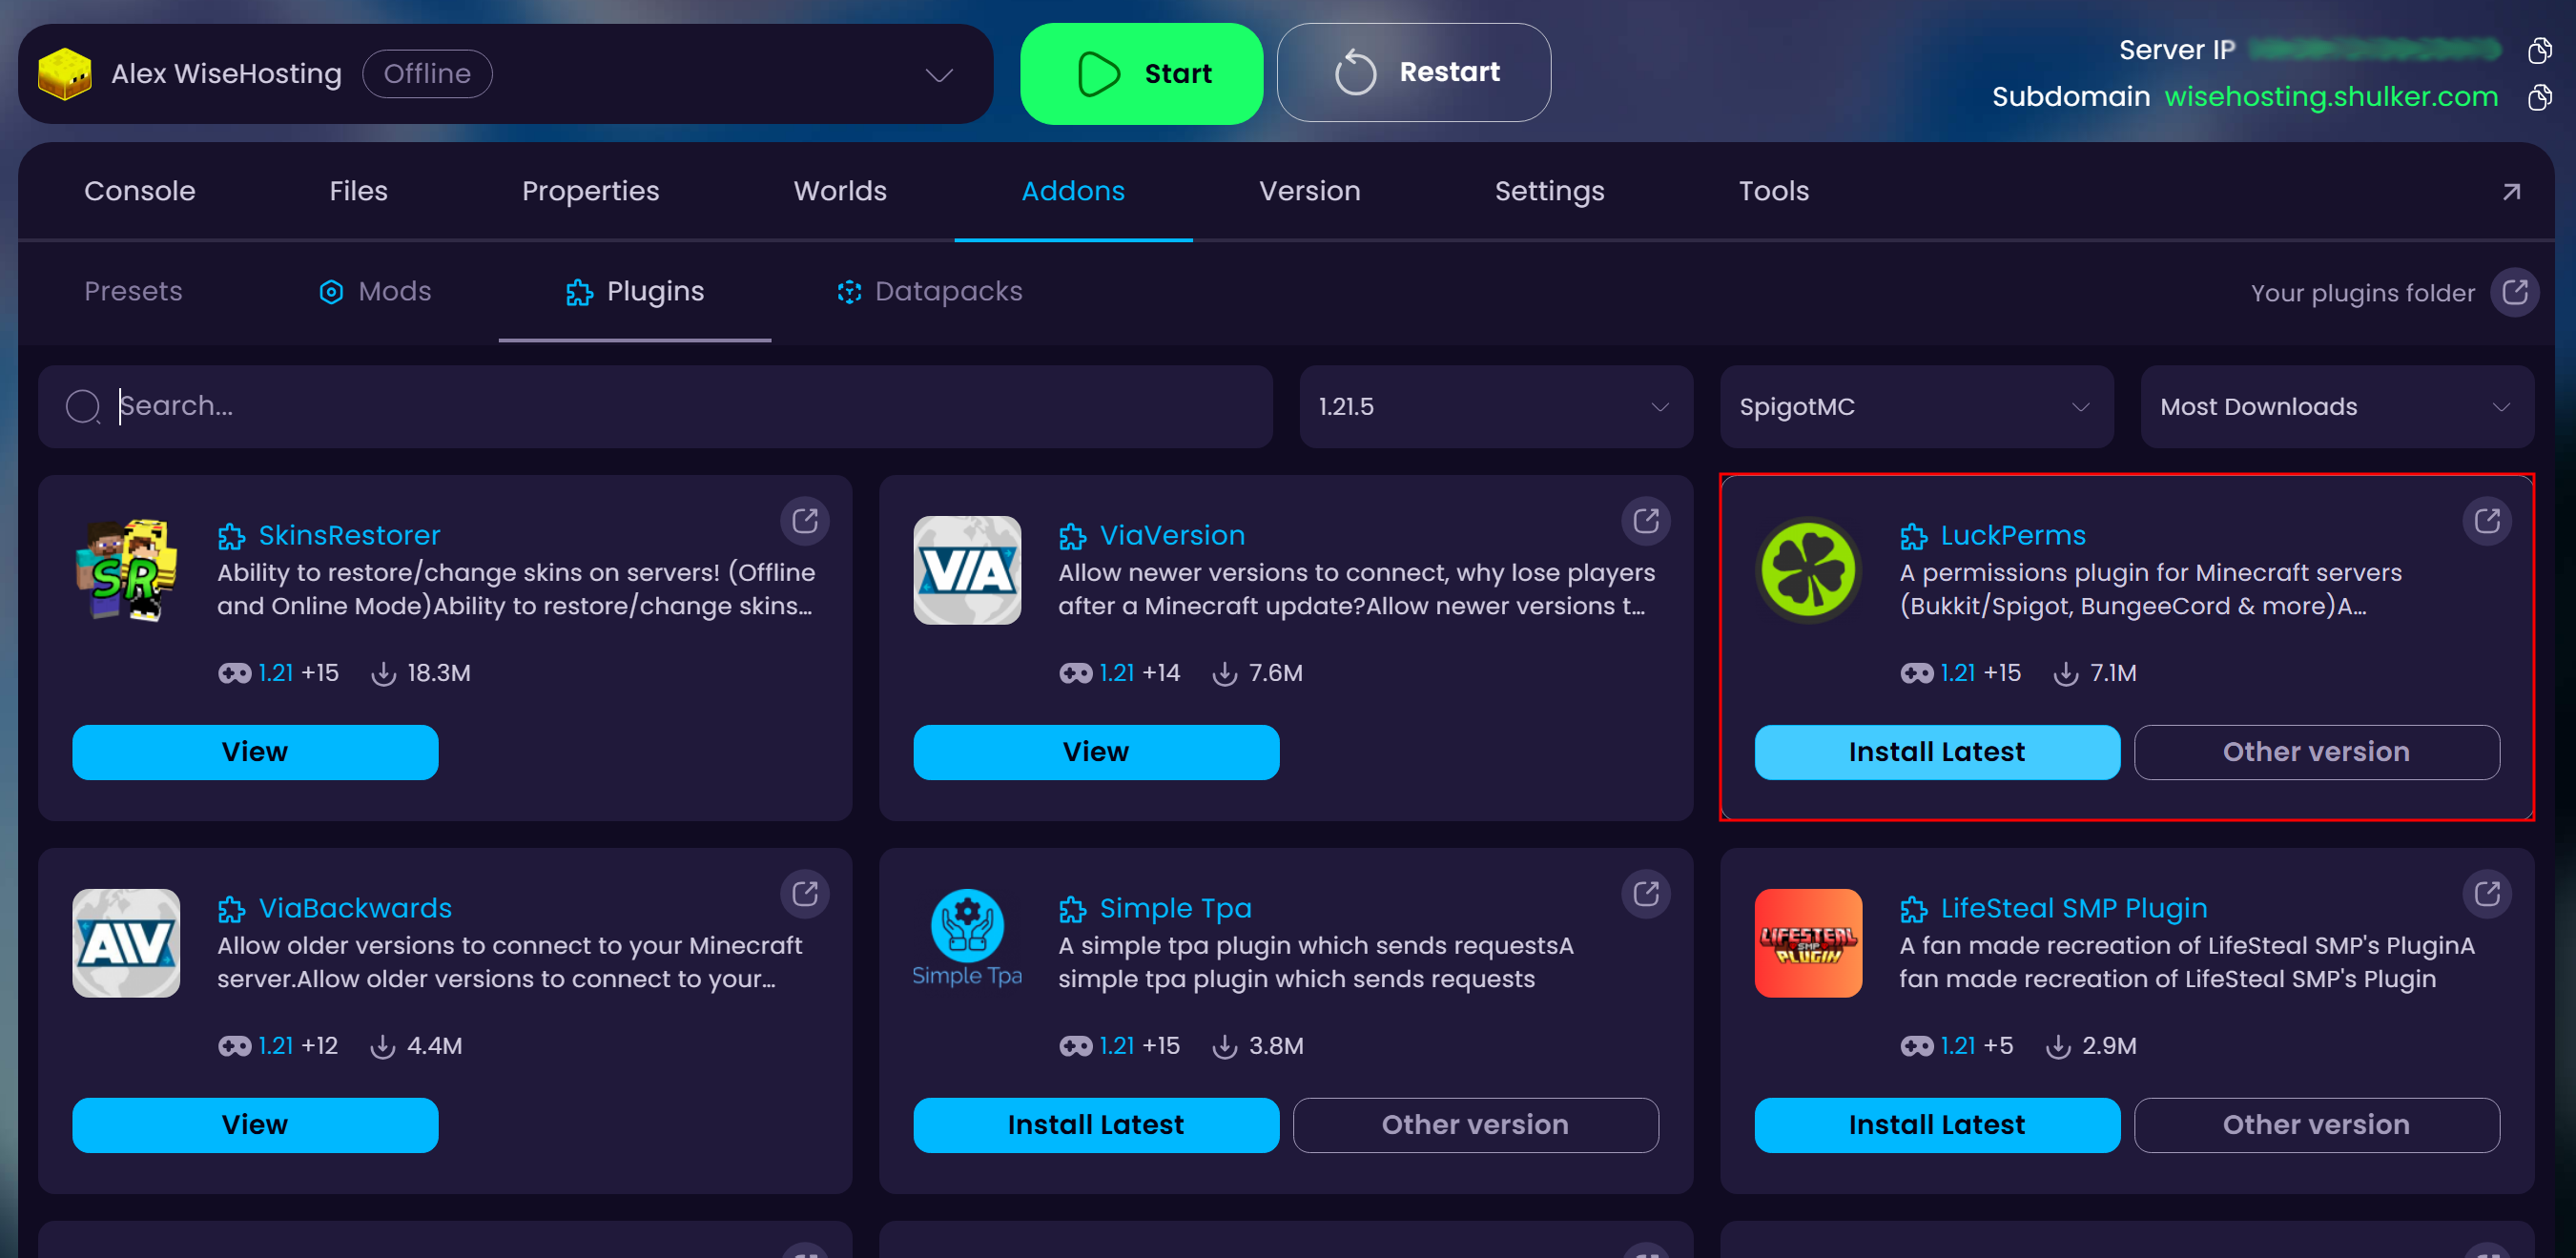
- Head over to the Game Panel and stop your server.
- Navigate to the Addons → Plugins tab and install the latest LuckPerms plugin to your server.
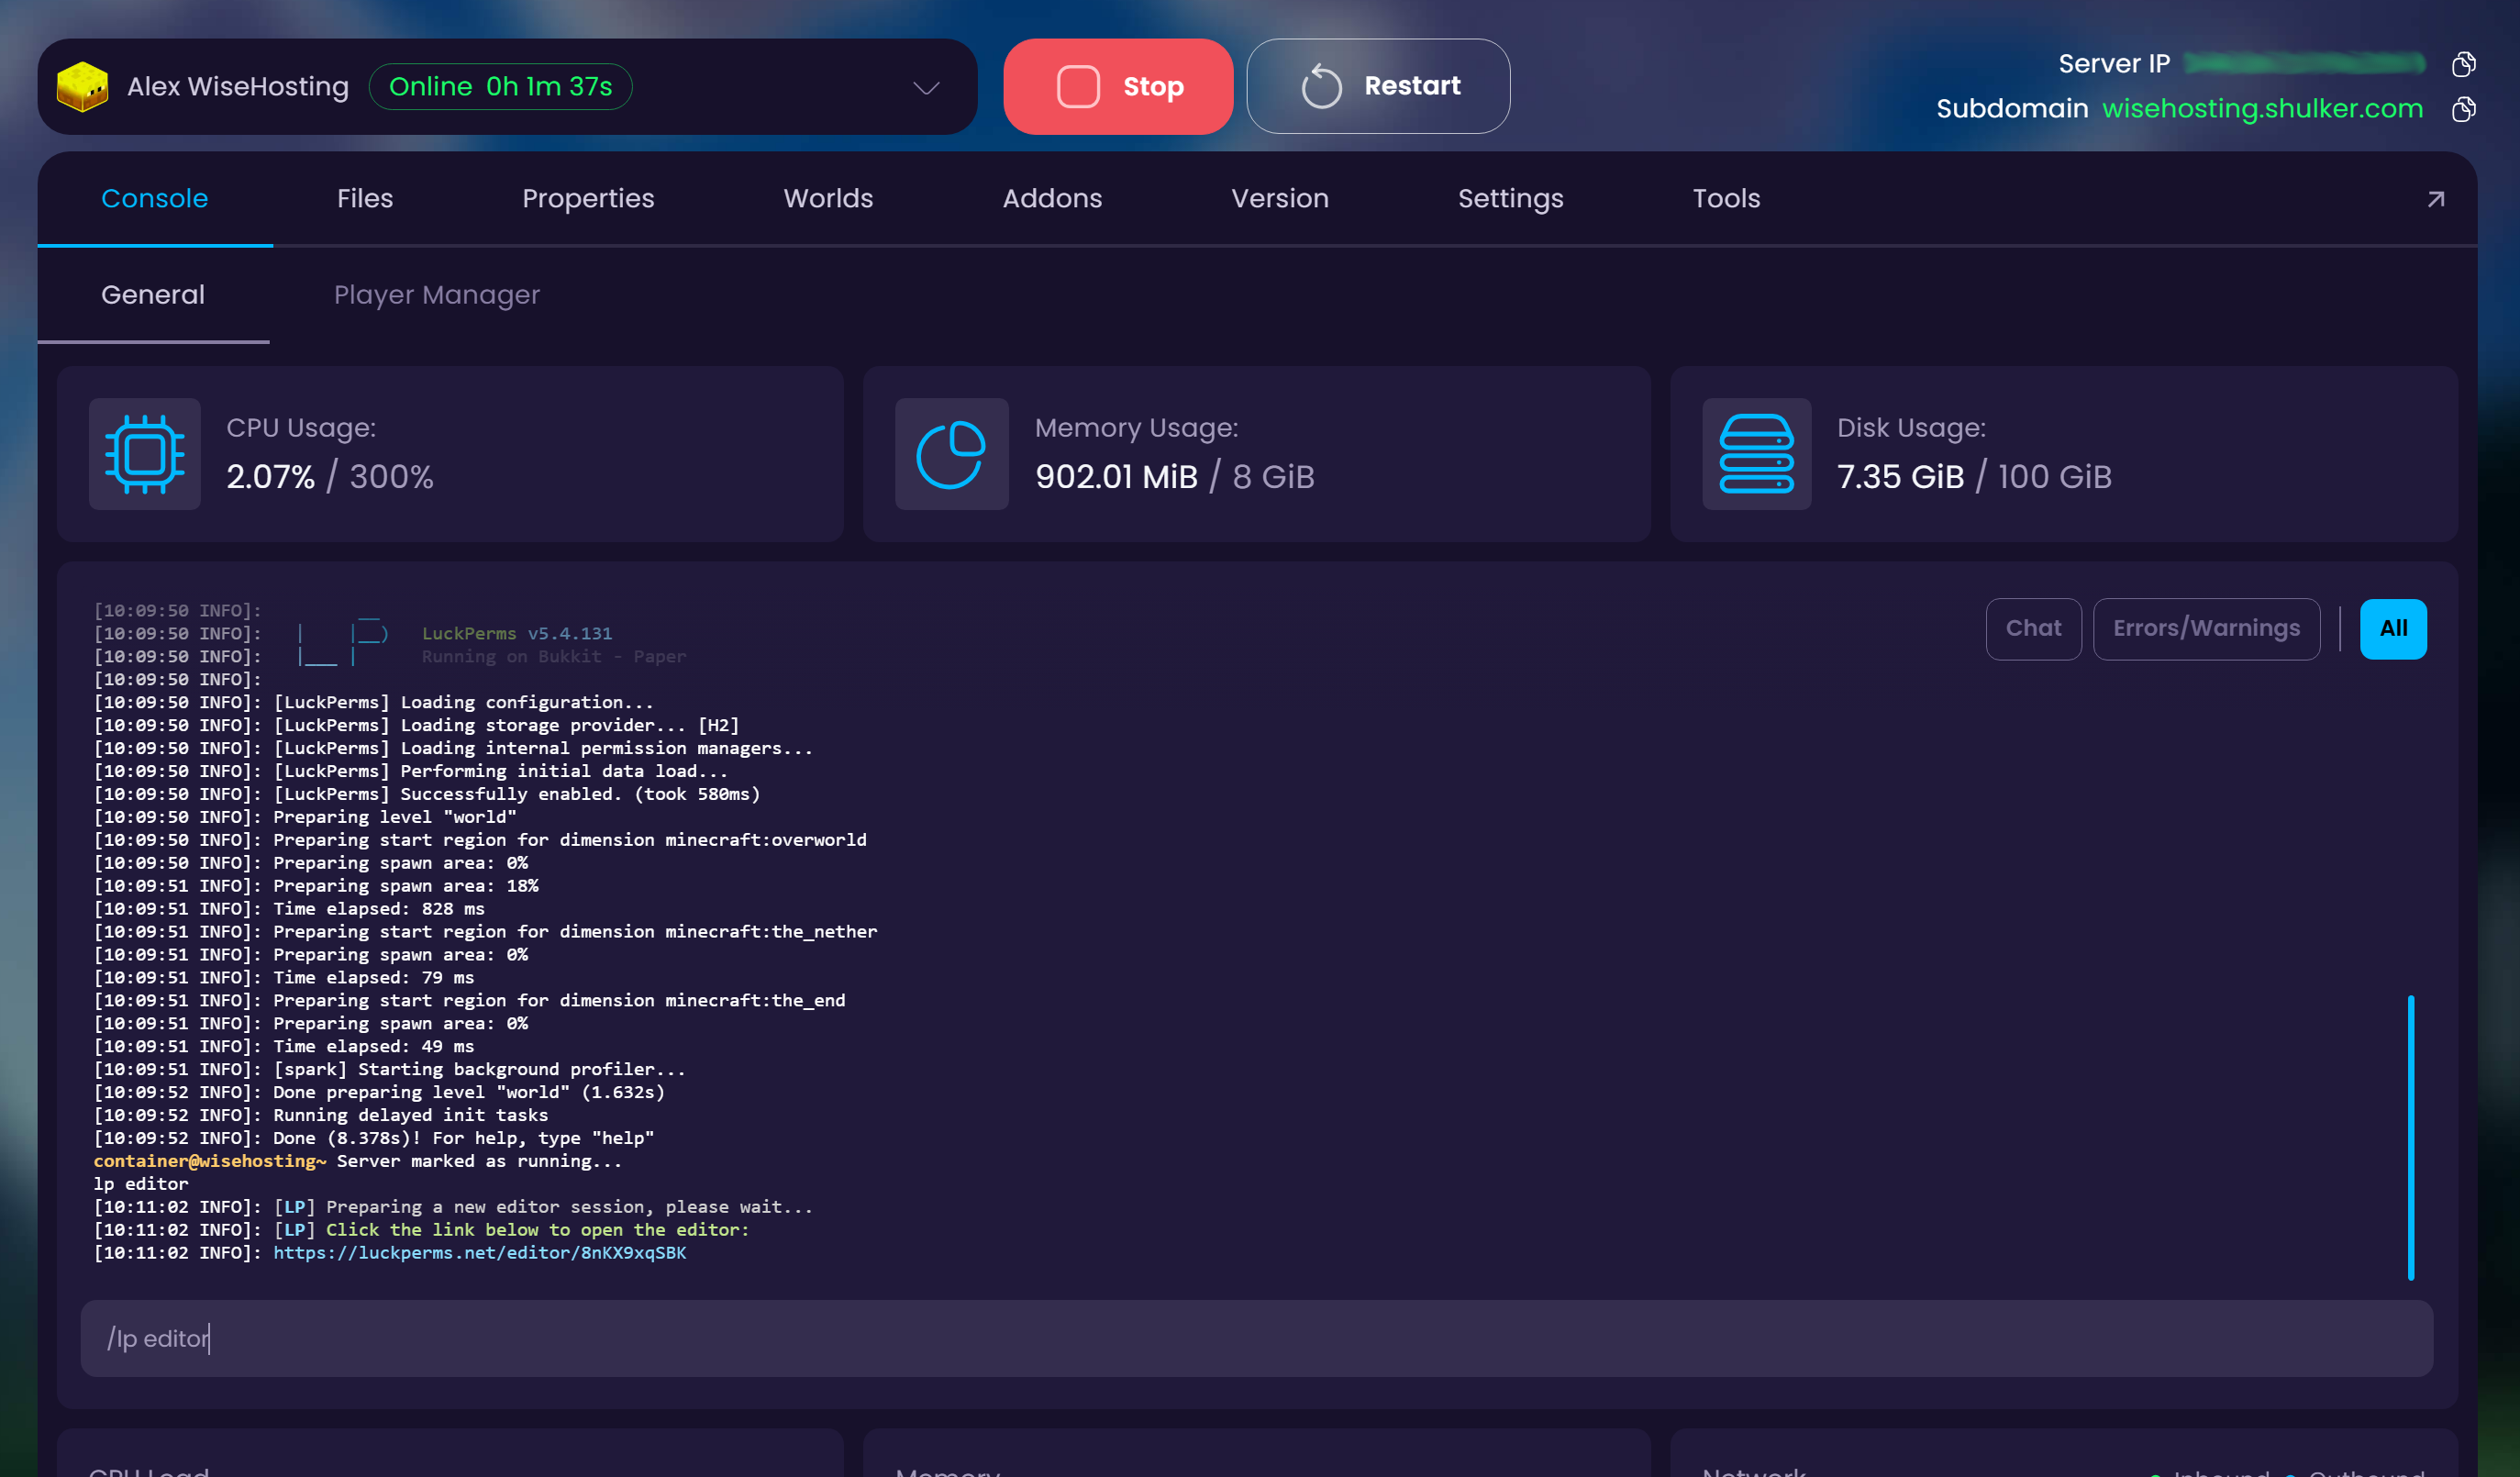
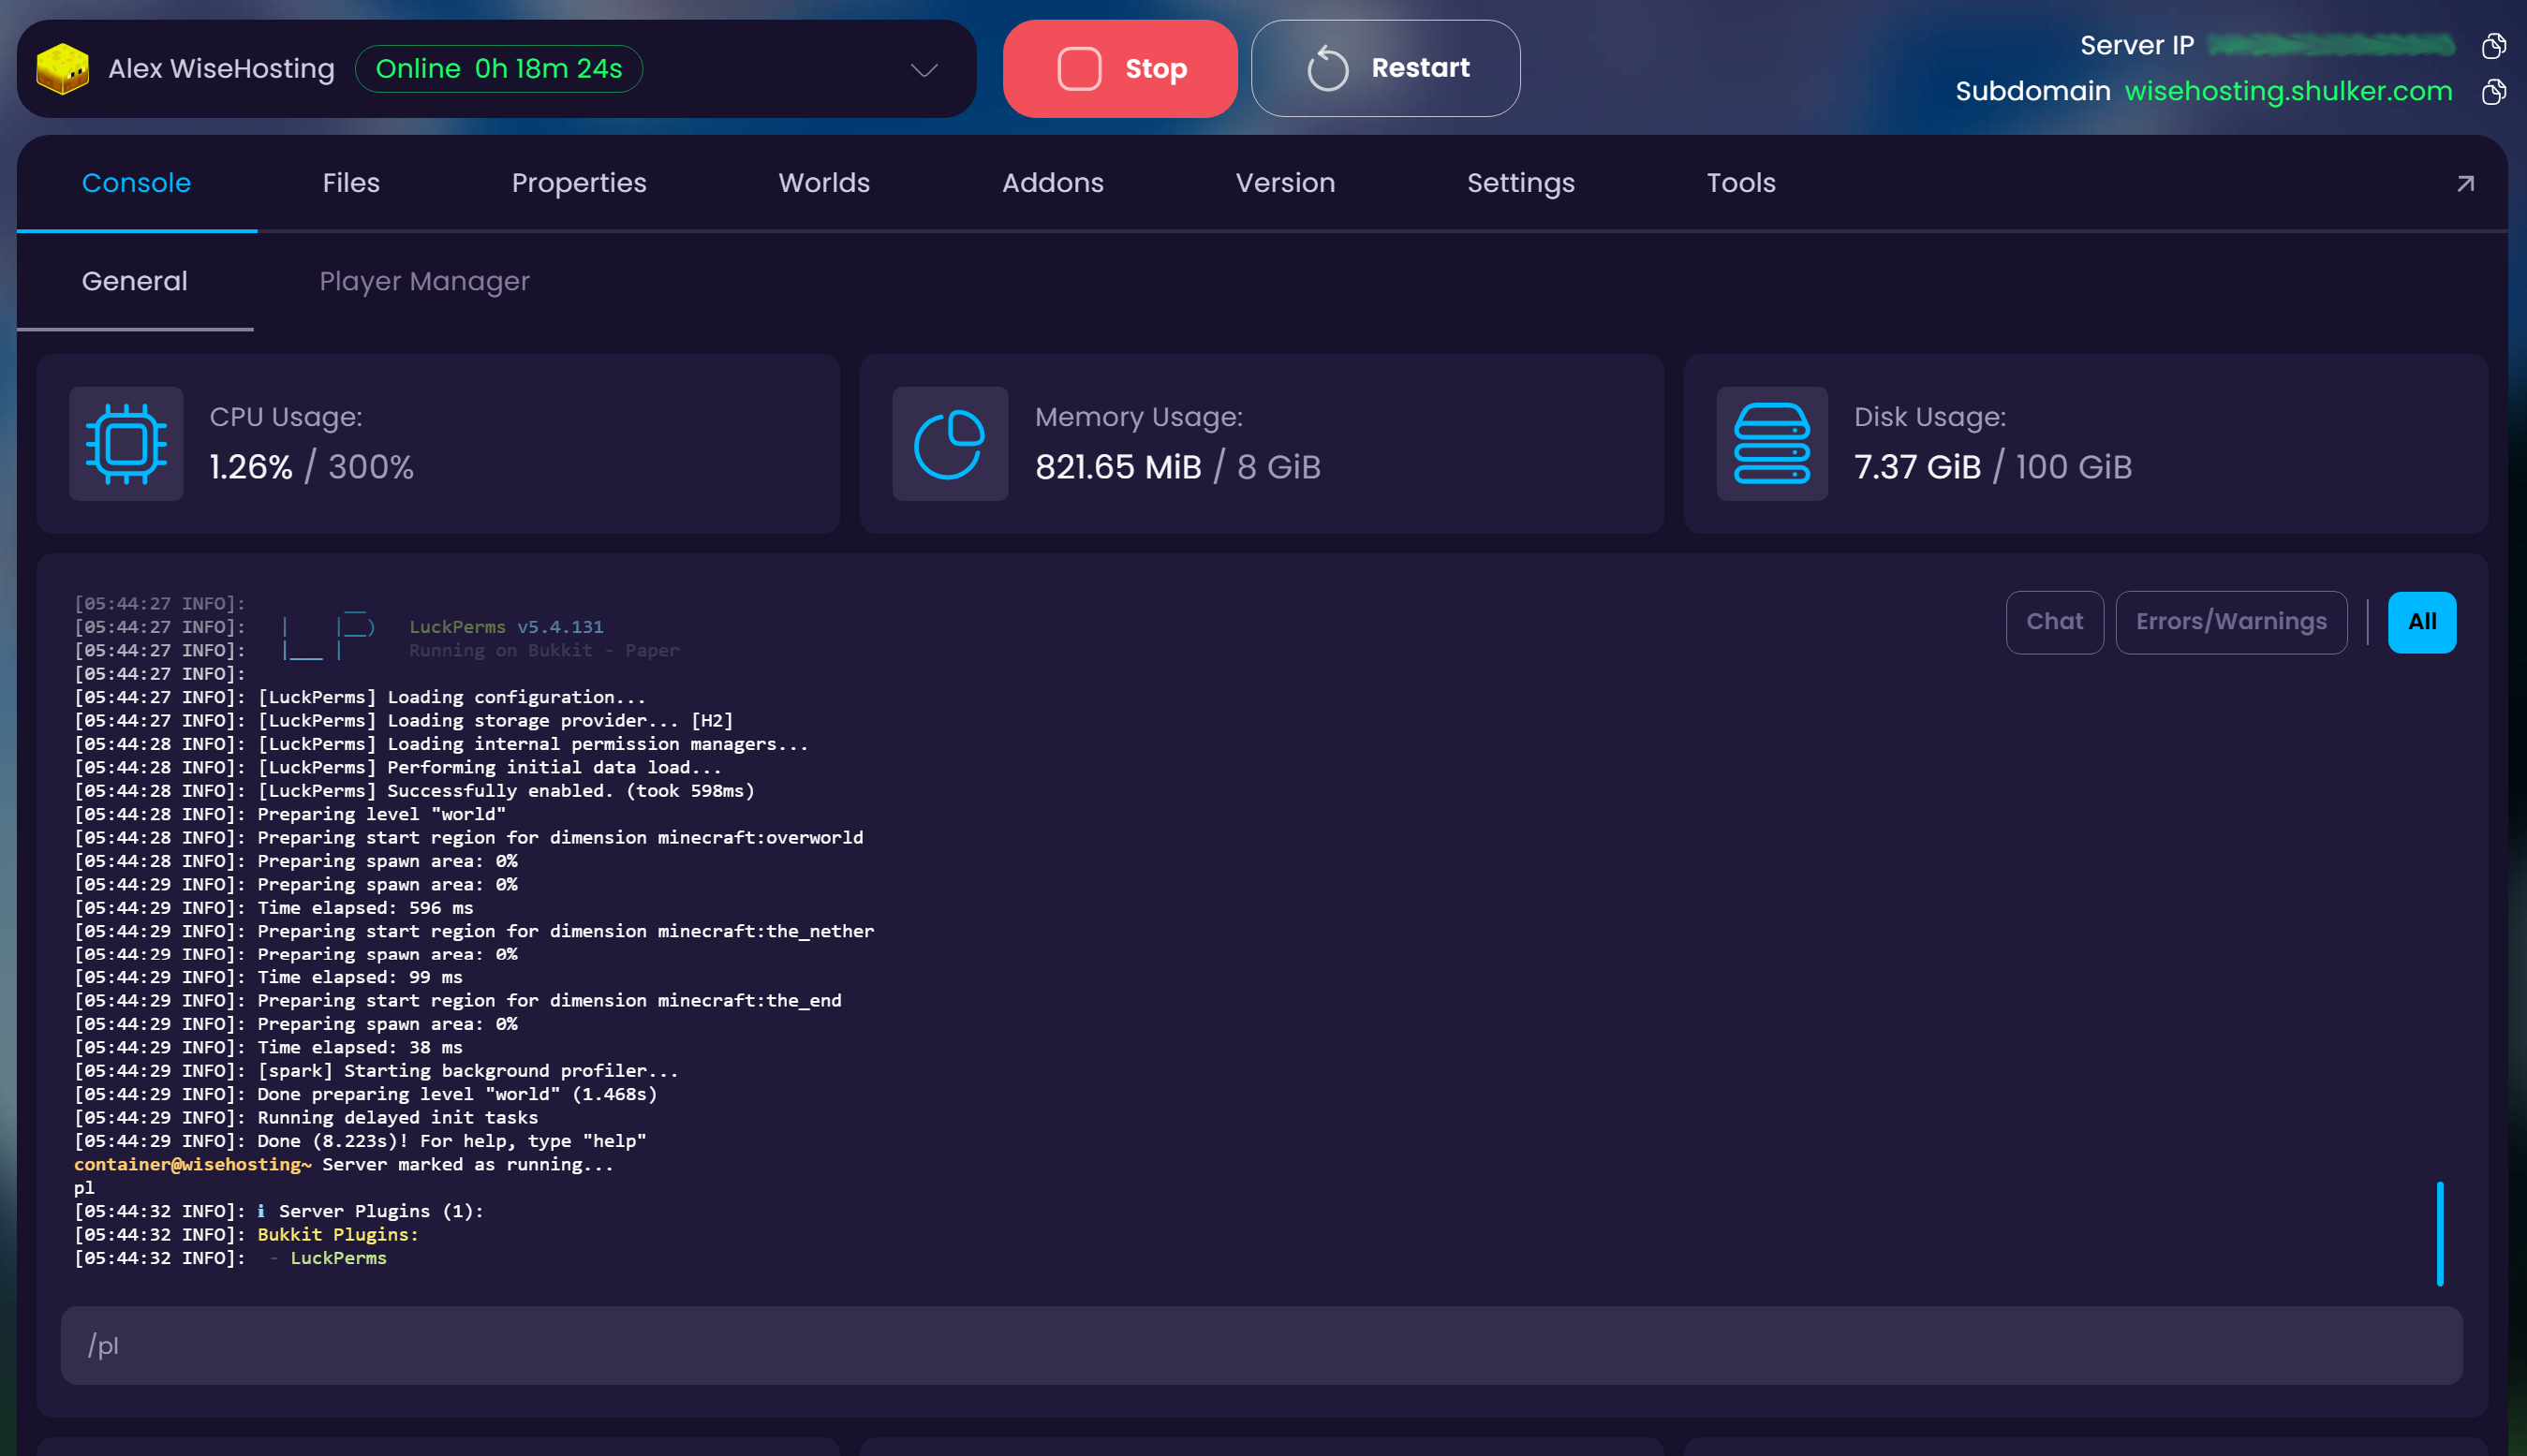
- Start up your server and check if LuckPerms started up, you can also use the
plcommand to see all the plugins that are installed to your server.
How to Configure Groups and Permissions in LuckPerms?
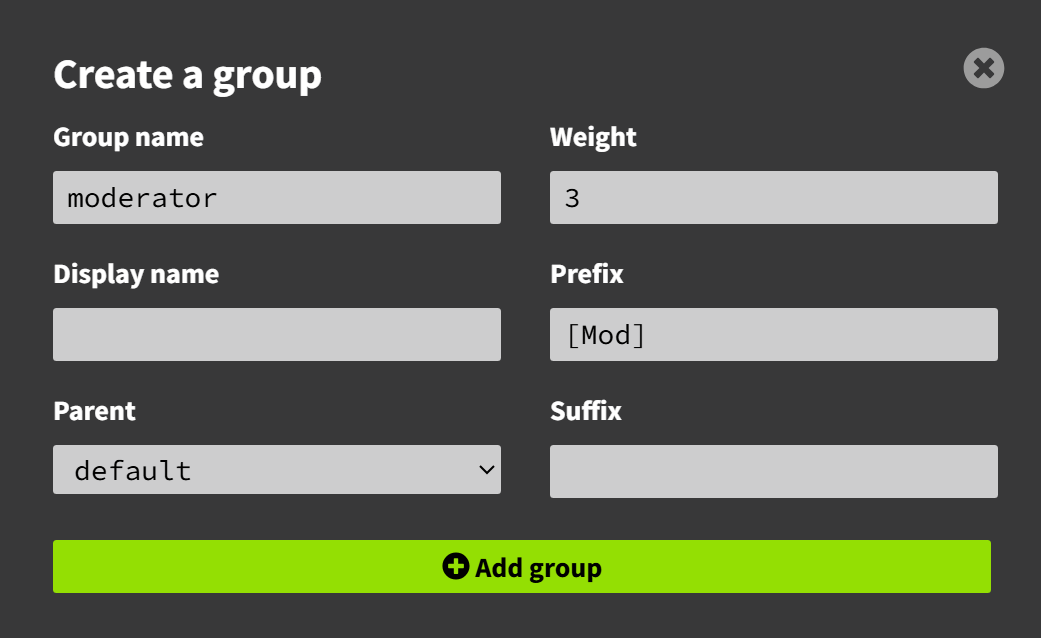
- Group name - The name of the group you’ll have to use when assigning players to the group through in-game commands.
- Display name - How the name of the group will be displayed in the LuckPerms Editor. This is NOT how the names of the players in this group will appear in-game.
- Parent - Your group will inherit all the permissions from the parent group, meaning that your group will be given all permissions that the parent group has.
- Weight - If a player has been assigned to multiple groups, the weight of the group will determine which group takes the priority for this player. Higher number means higher priority.
- Prefix - Text that will be displayed before your username in game chat (requires the “Vault” plugin)
- Suffix - Text that will be displayed after your username in game chat (requires the “Vault” plugin)
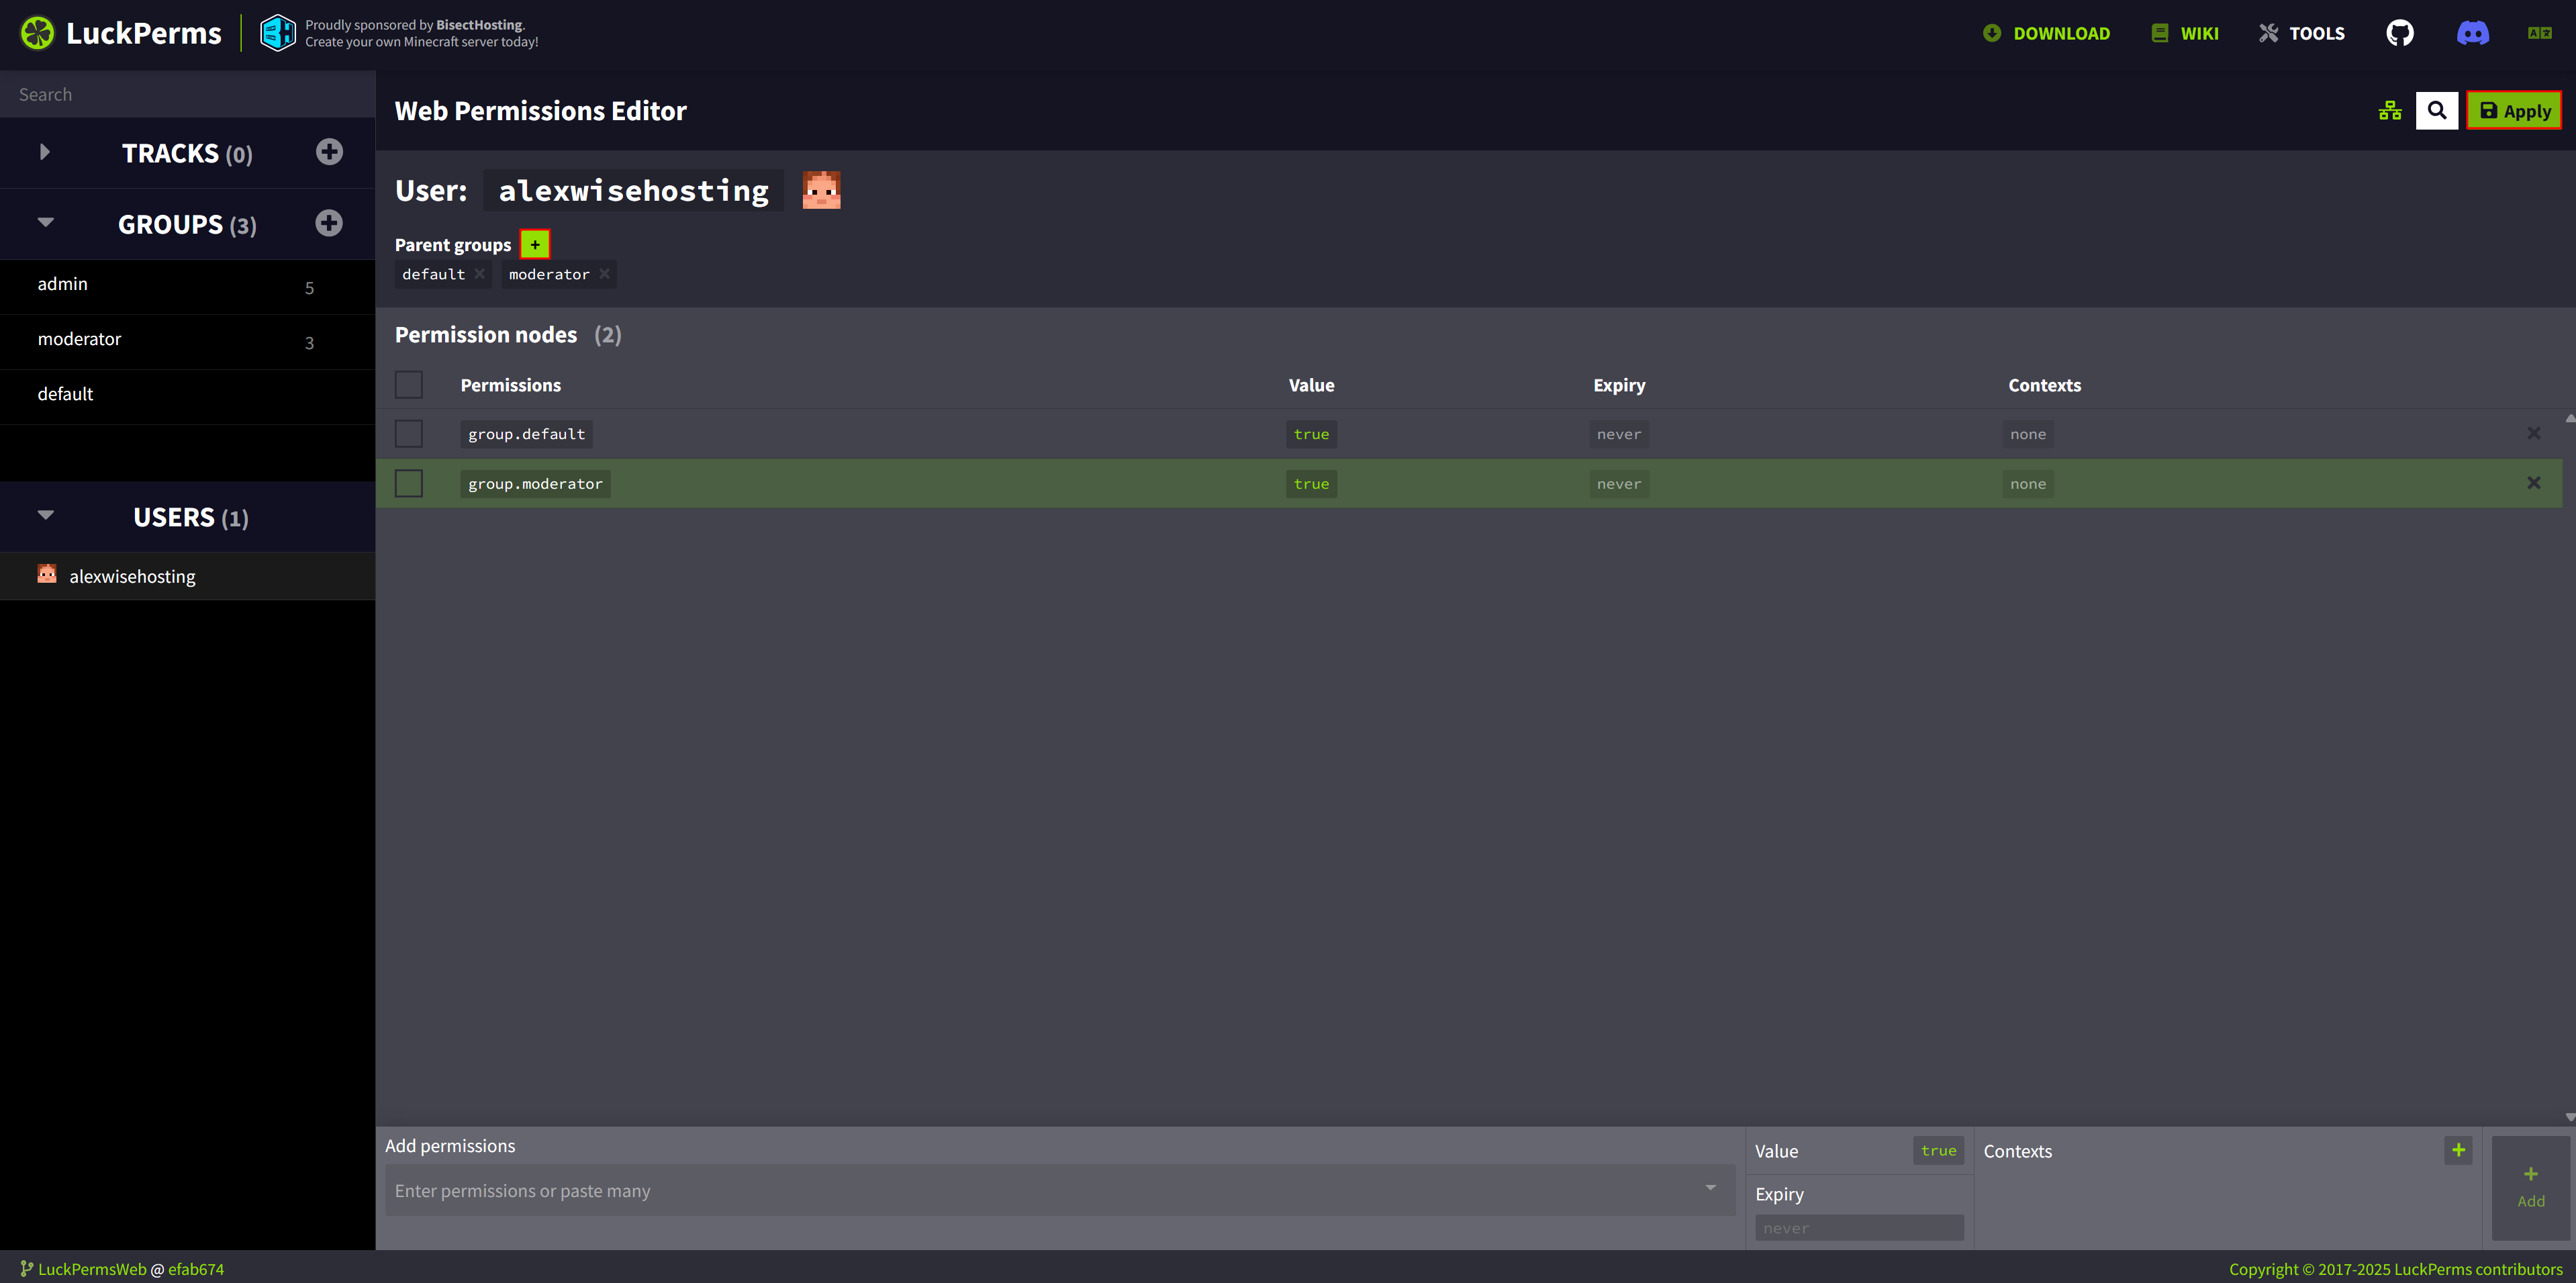
After you’ve finished setting up the groups it’s time to assign users to your groups. Join your server so your player would appear in the “USERS” tab, click on the plus icon next next to “Parent groups”, assign the group that you made and click on Apply.
/lp user <username> group add <group-name>Now that you’ve assigned users to the groups you made and applied the settings, these players will be granted permissions to use the commands associated with their groups.Find and add the permissions you’d like to enable for your group from the search bar below, click on “Add” and “Apply” to save.
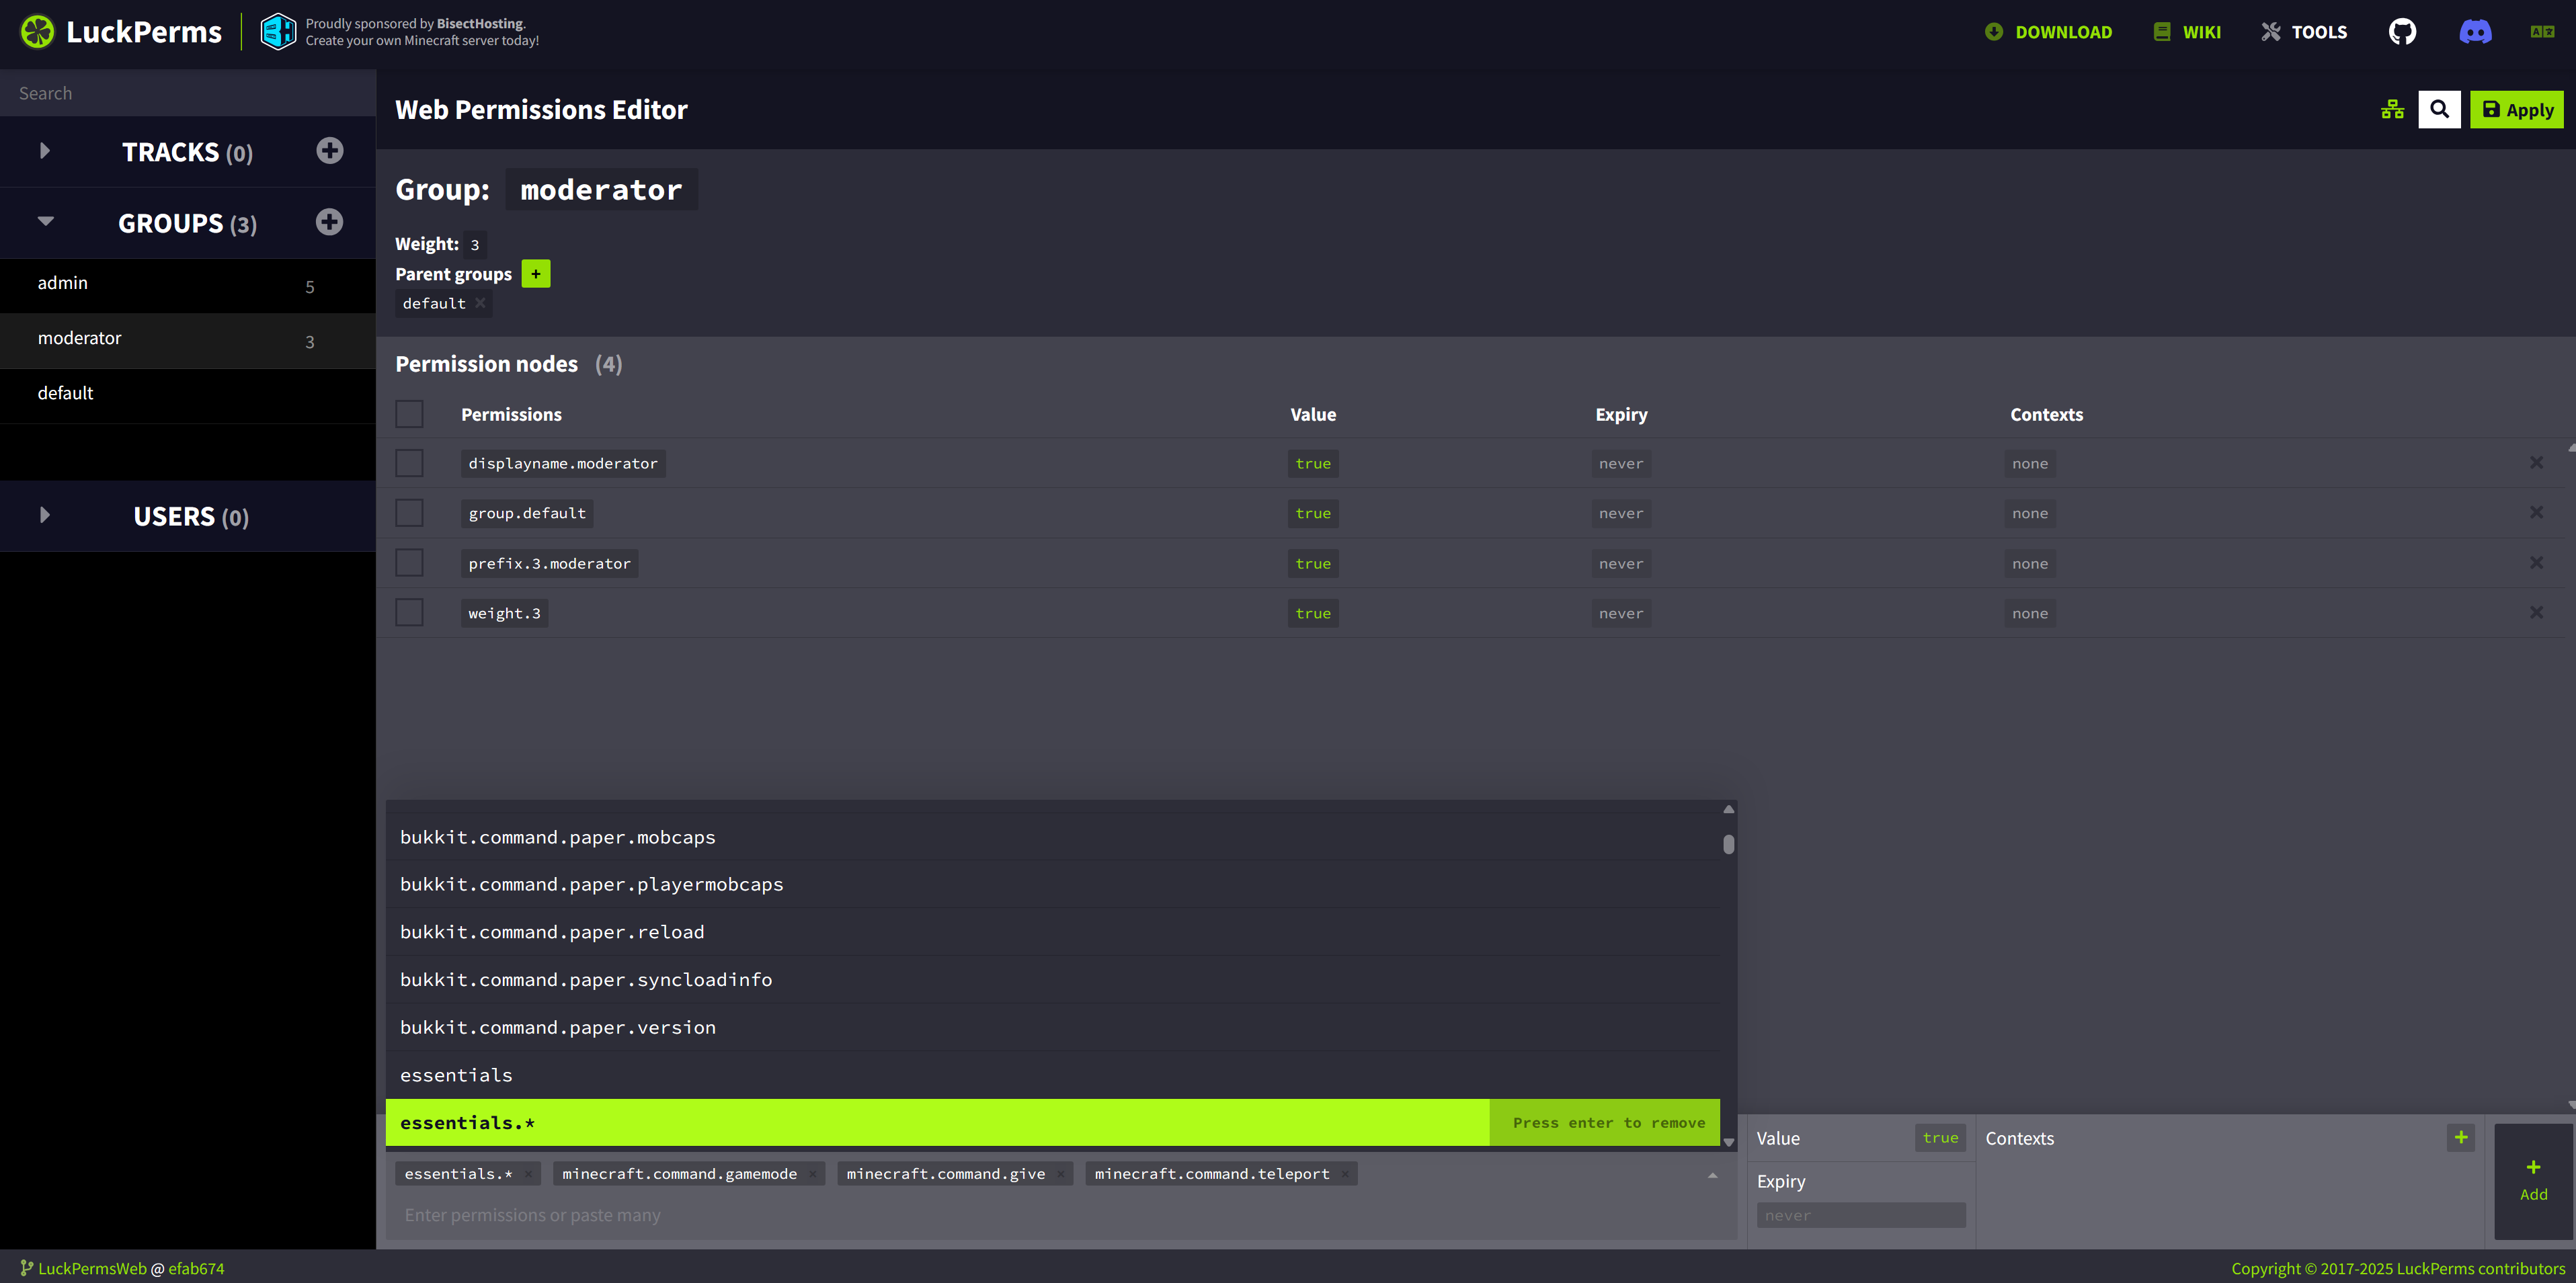
If you assign users to a group, they’ll be able to use all commands that have been assigned to this group. In this example I’ve added all the “EssentialsX” plugin commands to moderators and some additional default minecraft commands like /give and /tp
Click on the plus icon next to “GROUPS” to create a new group.
Go to the link that it gives you in the console, copy and paste the verification command to your server’s console to link LuckPerms to your server and you should see a fresh permission editor that looks like this:
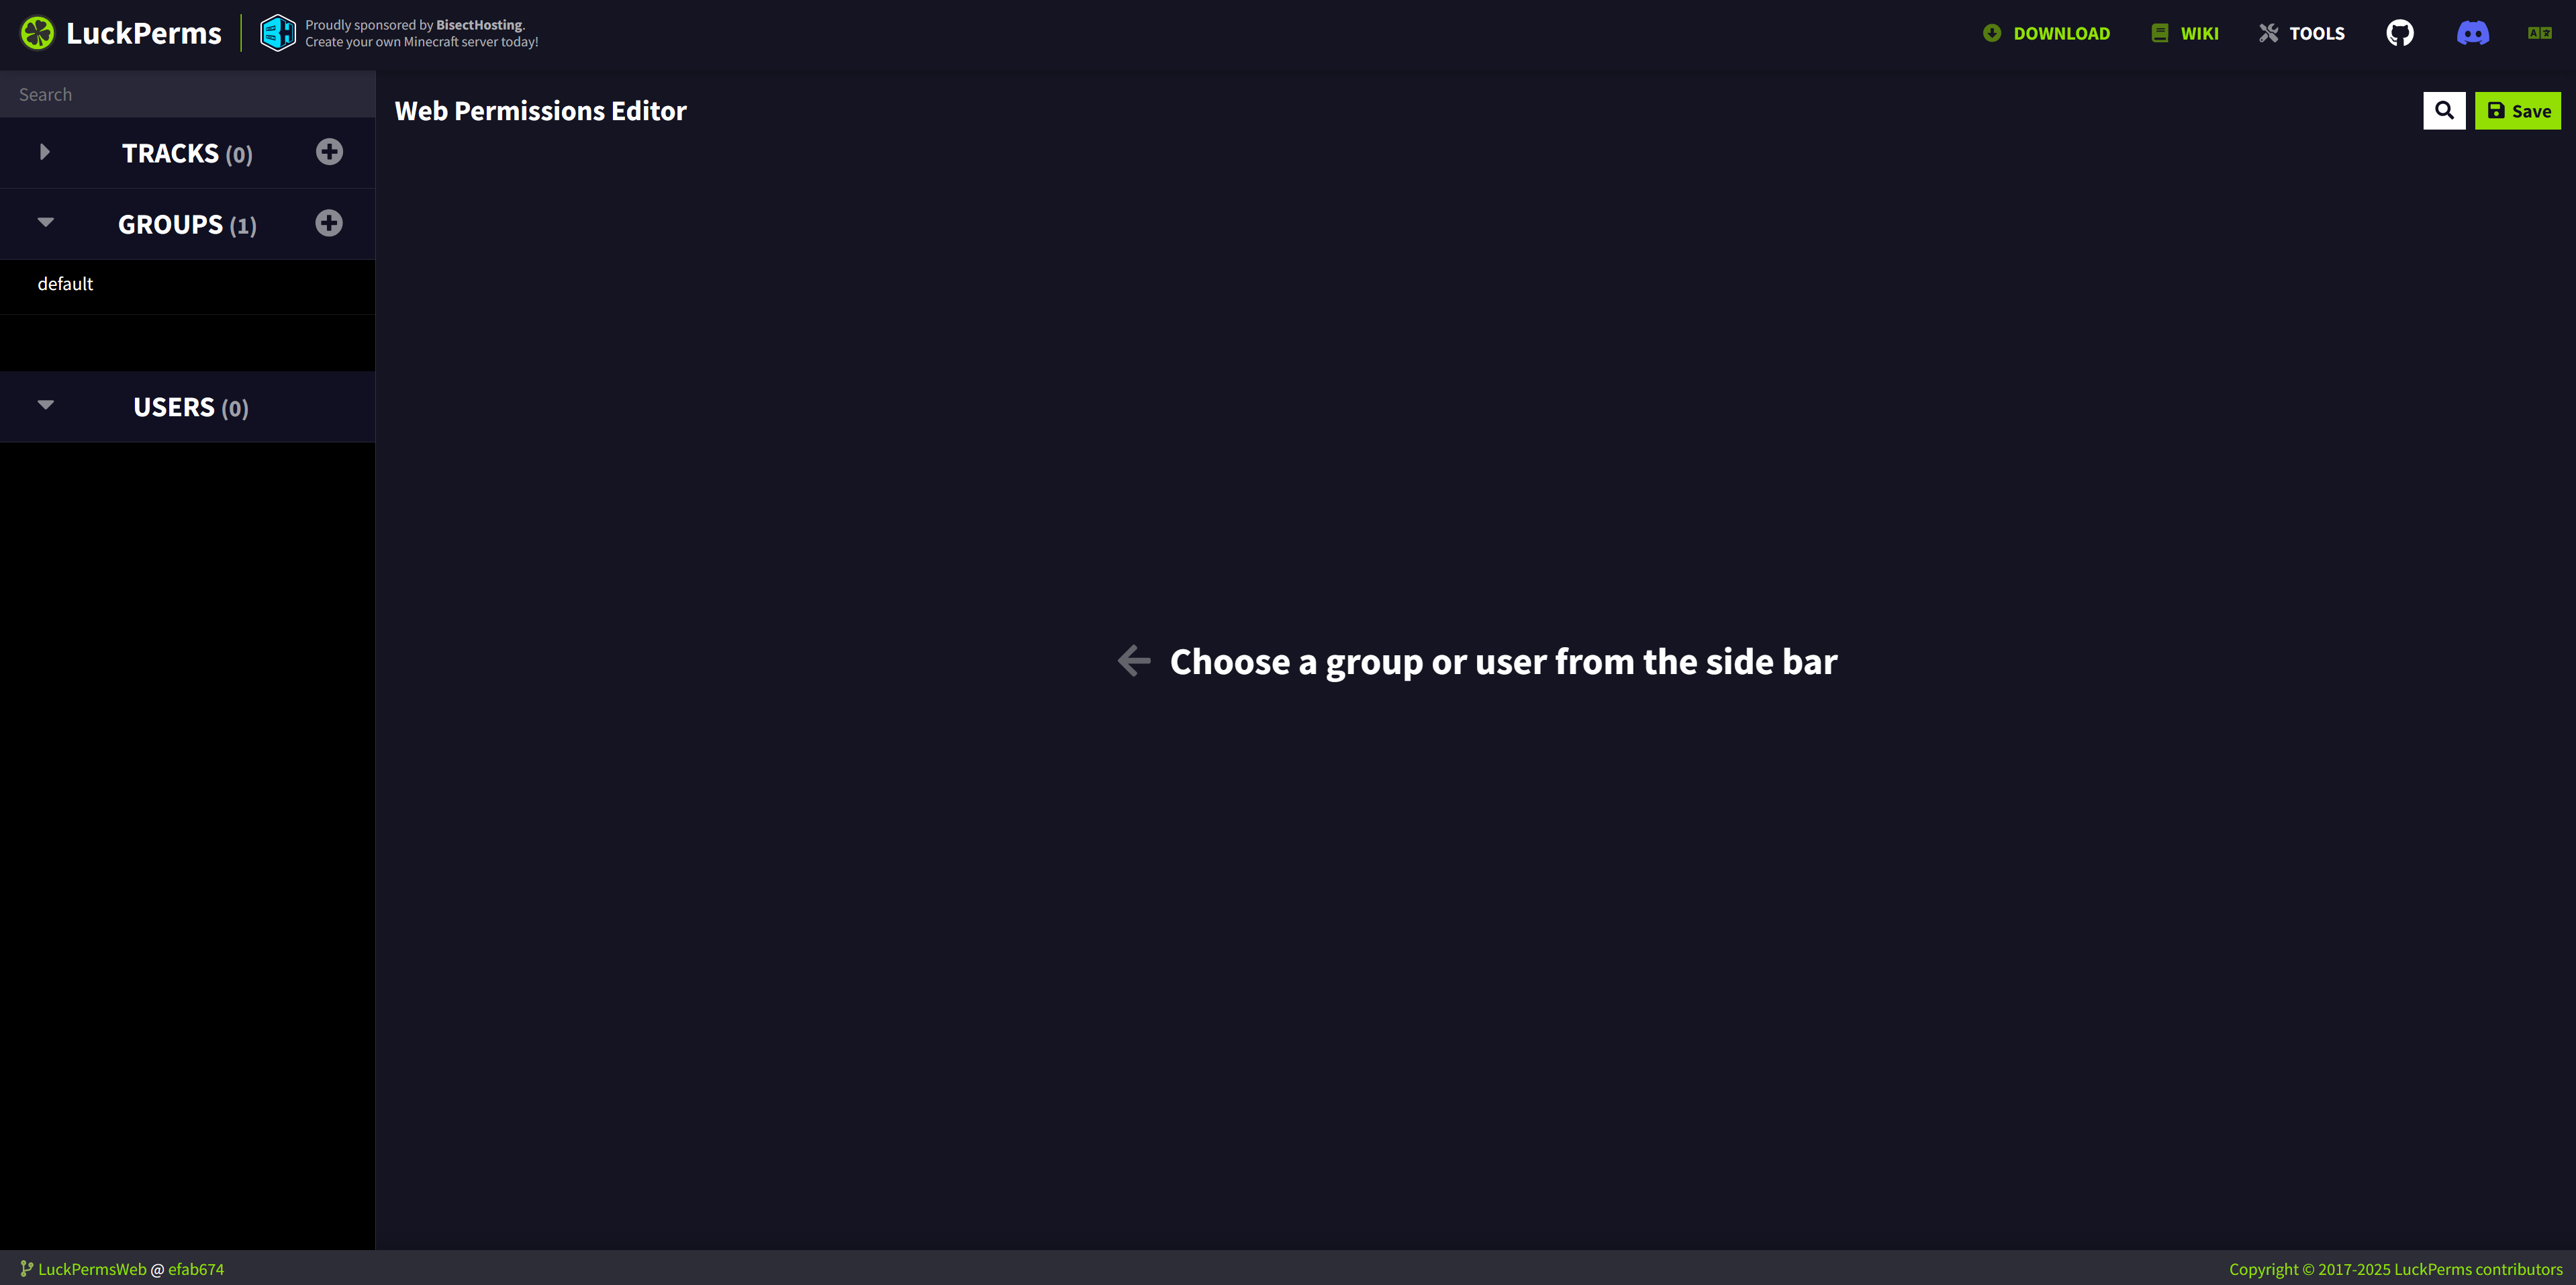
All the players that join the server will be automatically assigned to the “default” group.
Open up the LuckPerms web editor by using the /lp editor command in your server’s console.