
How to Install Bluemap (automatically)?
- Head over to the Game Panel and stop your server.
- Navigate to the Addons → Presets tab and install the Bluemap preset.
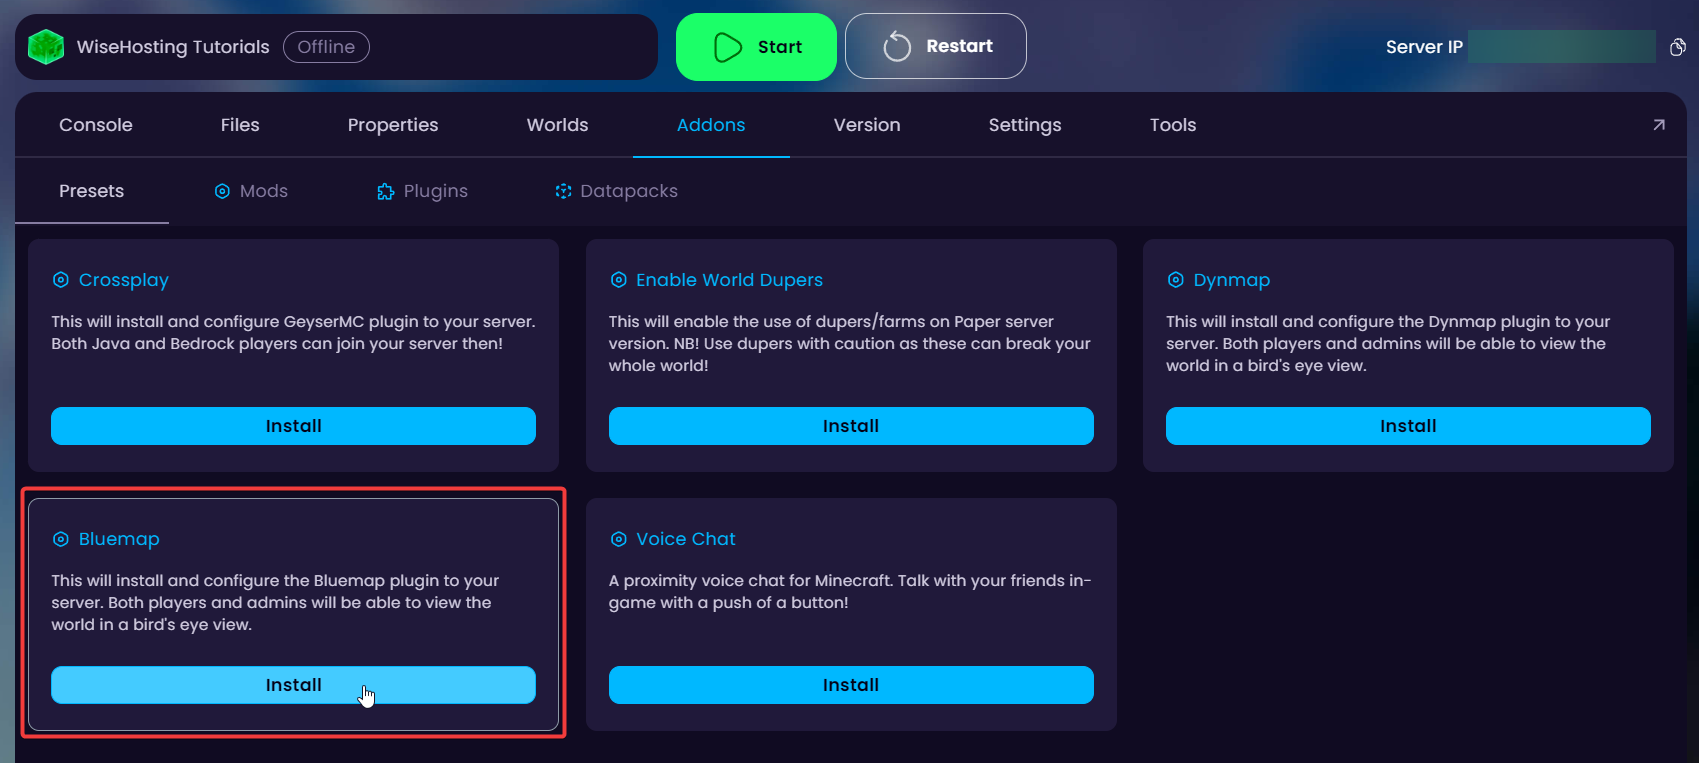

- After installation, it will provide you with a link as shown in the image above. This is where the live map can be accessed.
- Start the server and wait for it to start rendering your world. After a few minutes, check the website to see the rendered world!
How to Install Bluemap (manually)?
Before you continue with the guide, download the Bluemap plugin/mod from here. Make sure it’s compatible with your server’s version!
- Head over to the Game Panel and stop your server.
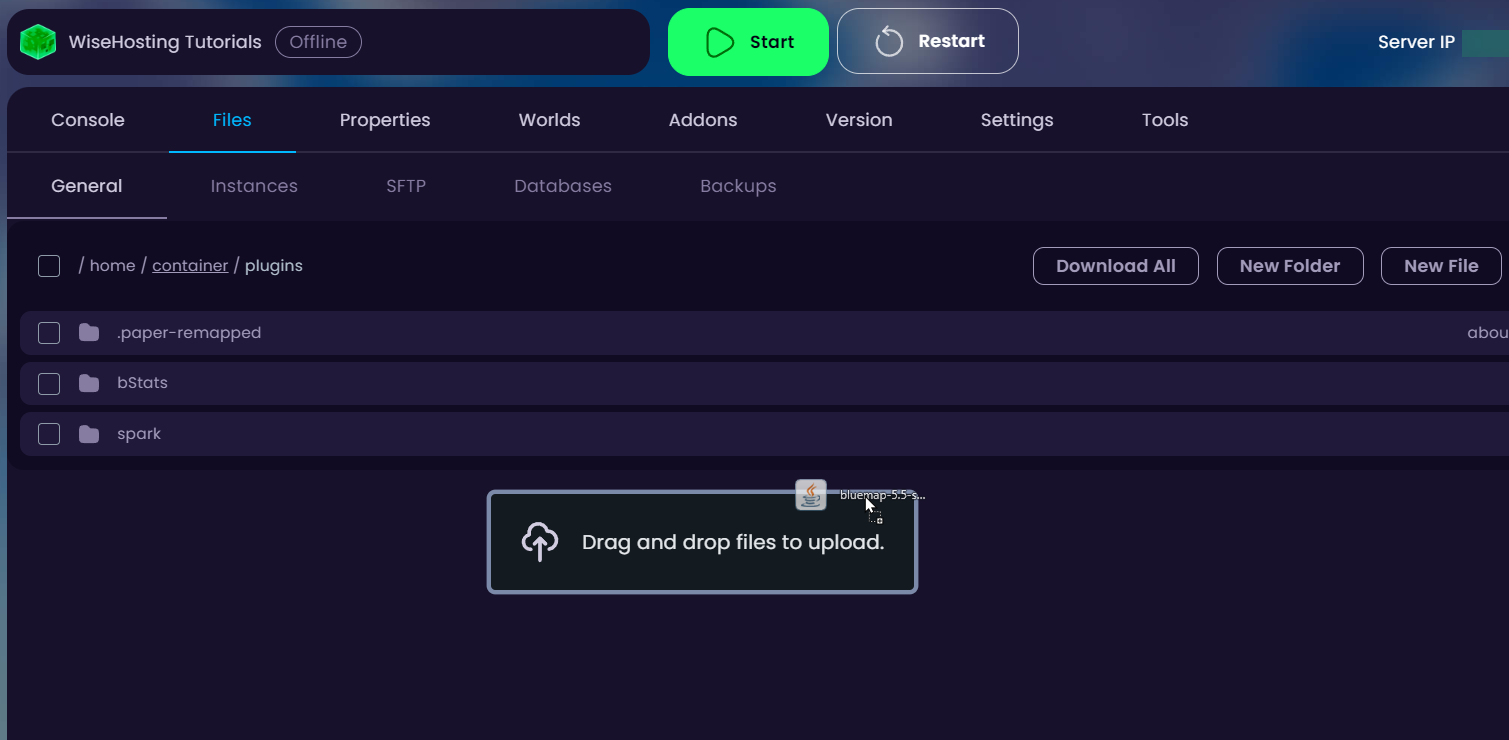
- Navigate to the Files → /plugins or Files → /mods folder depending on which version your server is. Drag the downloaded plugin/mod there and start your server for it to generate the necessary files.
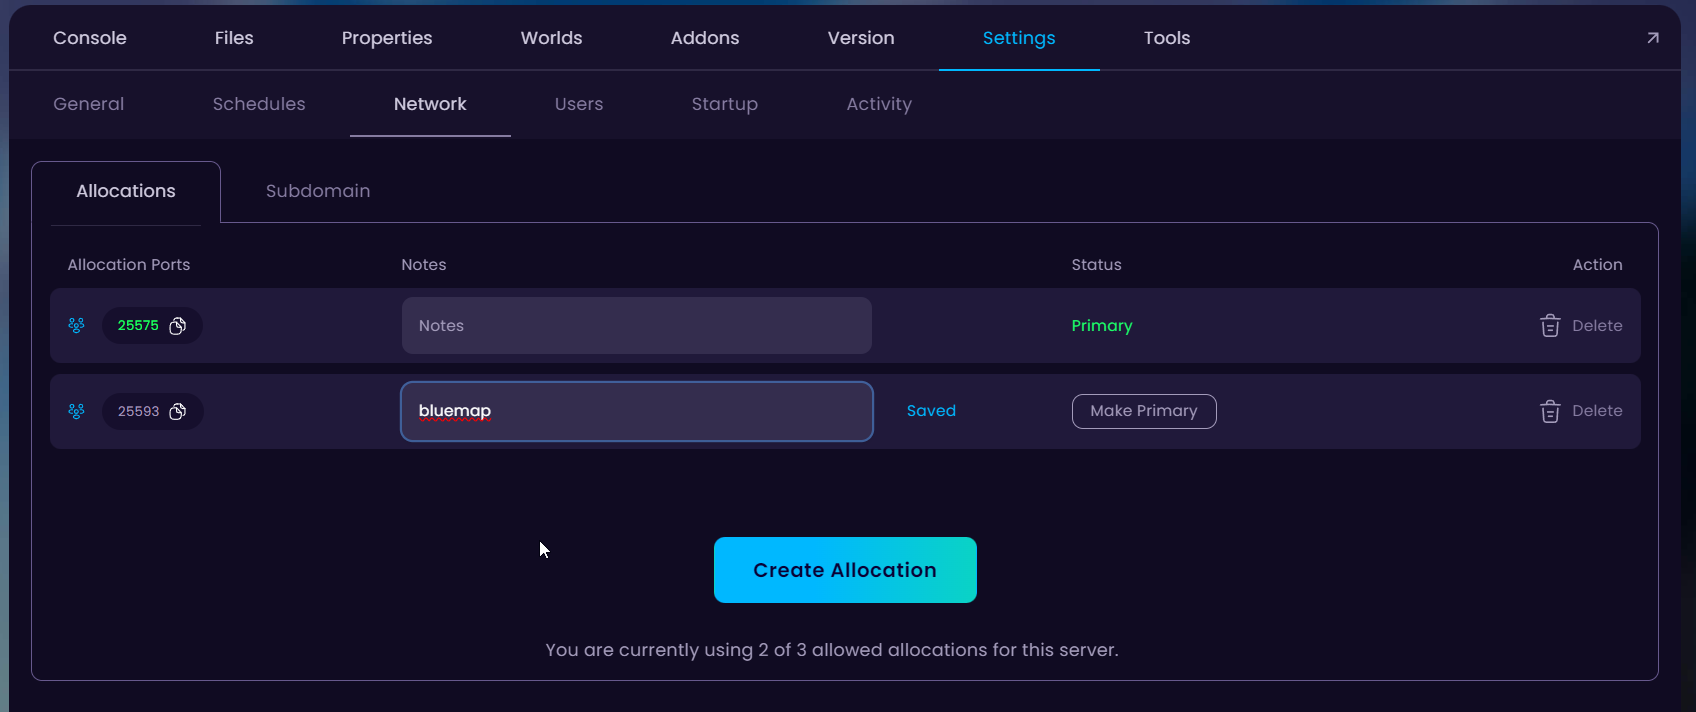
- Once the files are generated, stop the server and head over to the “Settings → Network” tab and click on the “Create Allocation” button to create a new port. Save this as this will be inserted into the Bluemap’s configuration file.
- Now open the Bluemap’s configuration file. If you installed a plugin, the configuration is located in the “/plugins/Bluemap” folder. For mods it’s going to be in the “/config/Bluemap” folder.
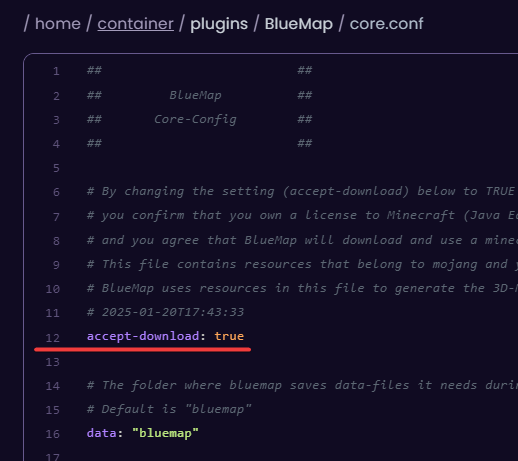
4.1. Open the core.conf file and change the “accept-download: false” to “true” in line 12.
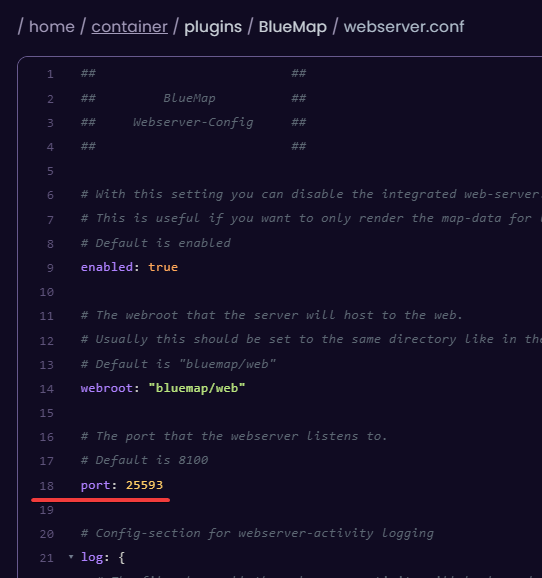
4.2. Open the webserver.conf file and change the “port:” in line 18 to the port you generated in the network tab.
- Start your server and wait for it to render some of the chunks. After a while, visit the live map through the “http://yourserverip:bluemap_port” link.


