
Allocating more RAM to your game can reduce lag and improve performance, especially when you use resource-heavy modpacks or high render distances. This guide shows you how to safely increase RAM for Minecraft Java Edition in the default Minecraft Launcher, CurseForge, and Prism Launcher.
⚠️
IMPORTANT: Only allocate up to about half of your PCs total RAM to Minecraft to avoid slowing down your operating system and other apps.
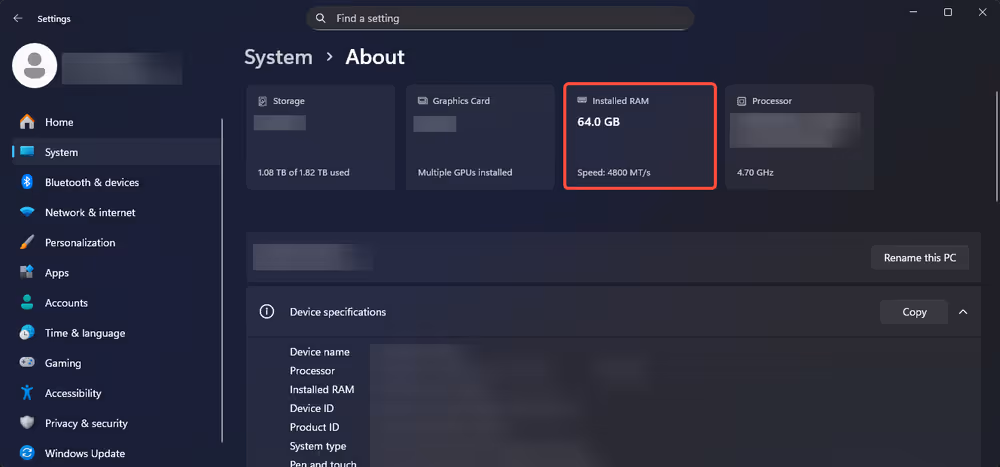
Check How Much RAM You Have
- Open your systems Settings and go to the System or About section (for example, on Windows: Settings → System → About).
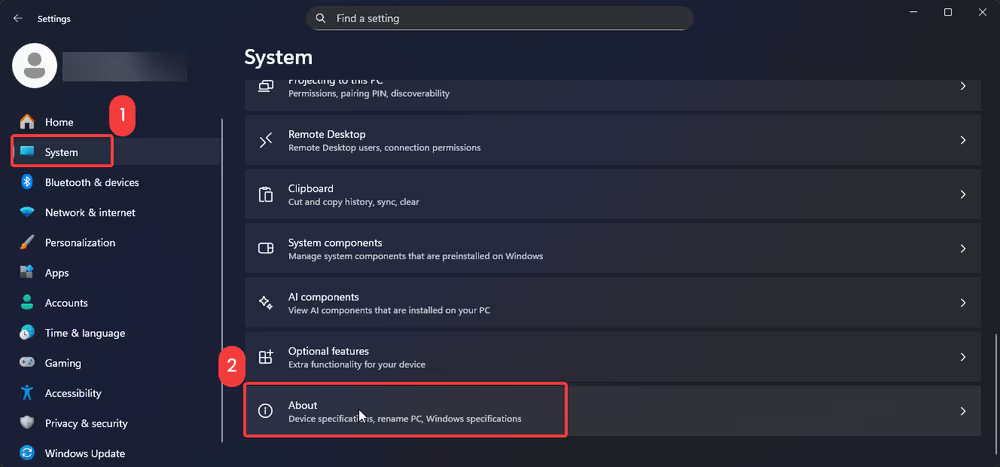
- Find the line that shows Installed RAM and note the total amount (for example, 8 GB, 16 GB, 32 GB).
Allocate More RAM in the Default Minecraft Launcher
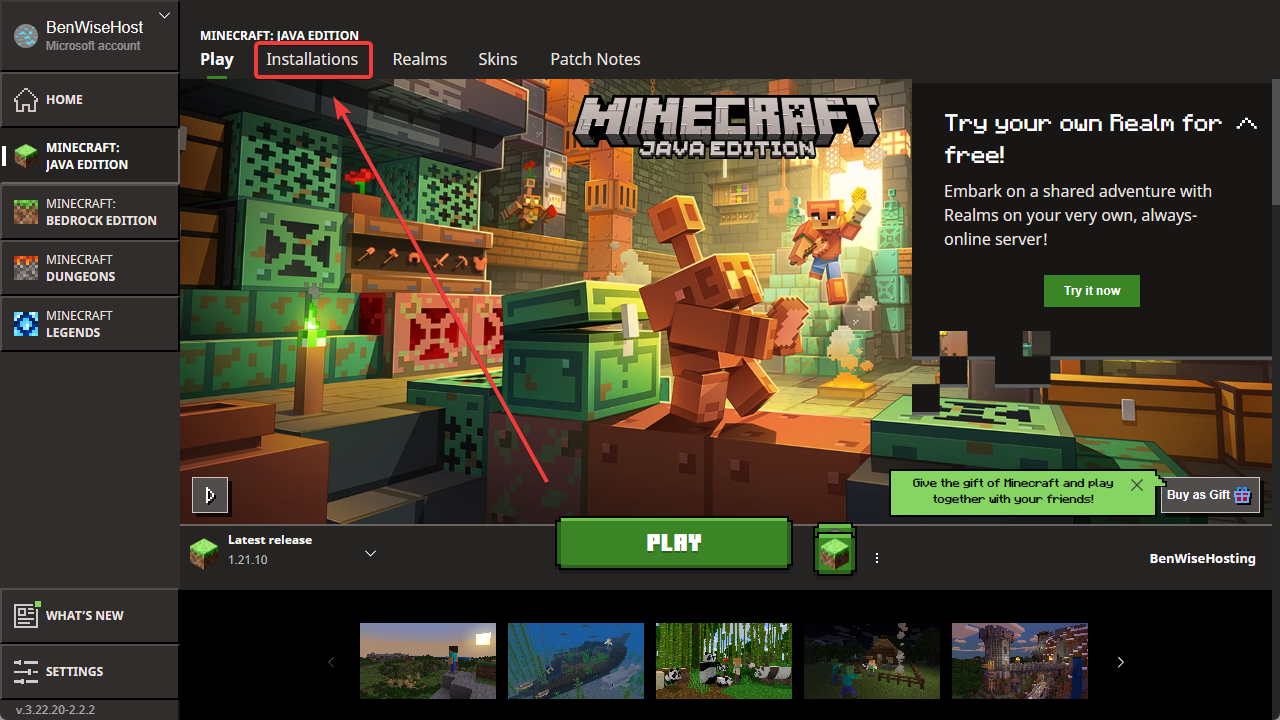
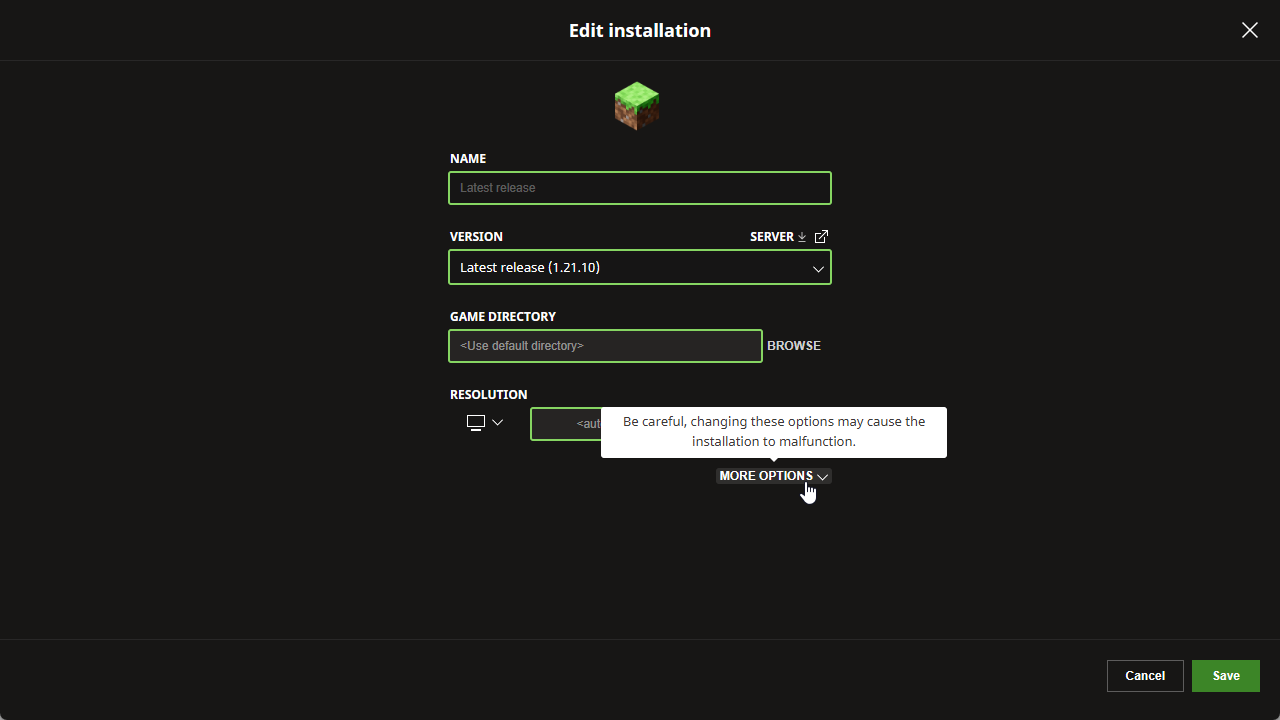
- Open the Minecraft Launcher.
- Click the Installations tab at the top.
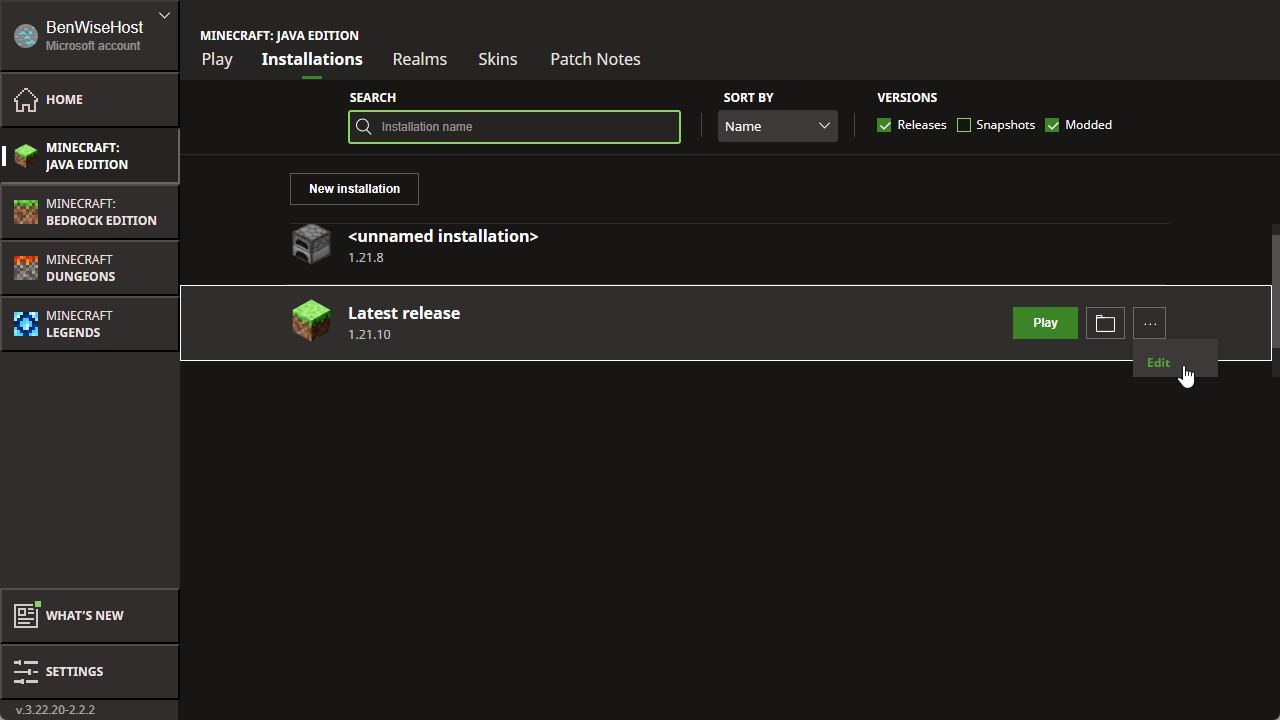
- Hover over the installation you play with, click the three dots (
...), then click Edit.
- Click More Options in the edit window.
- In the JVM Arguments box, find the part that looks like
-Xmx2G(the number is your current maximum RAM in gigabytes).
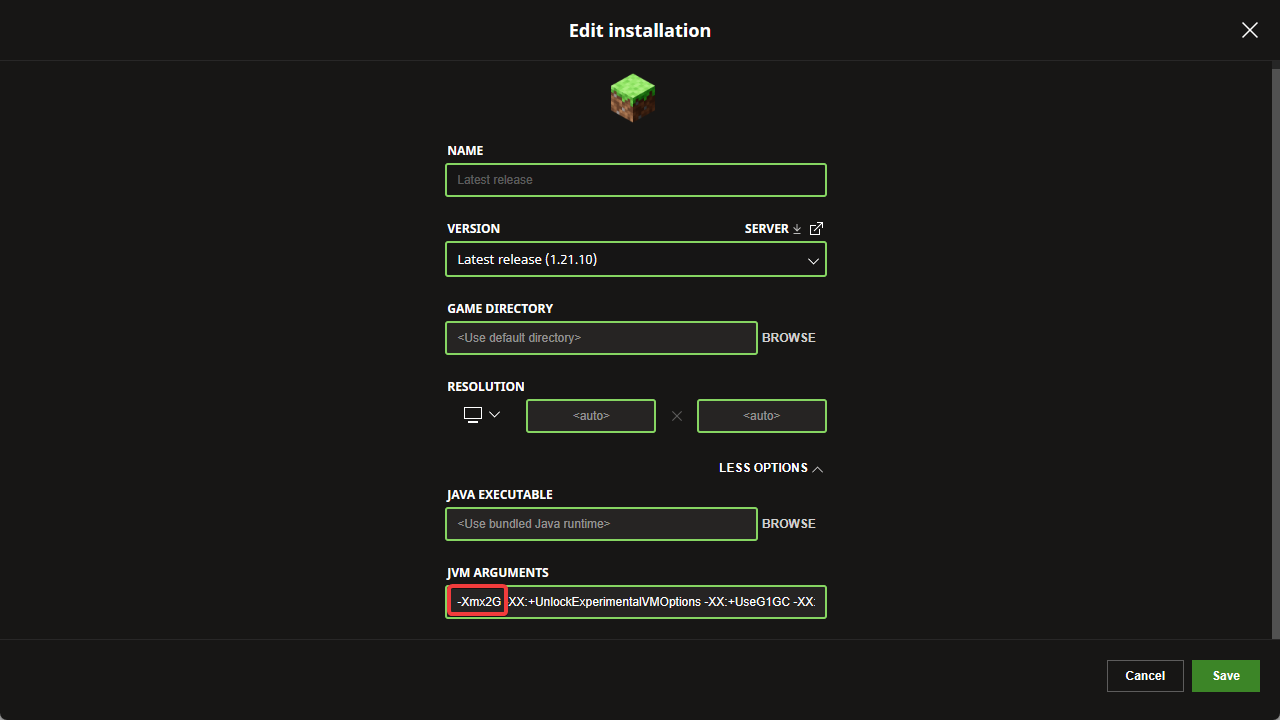
- Change this value to the amount of RAM you want, for example:
-Xmx4Gfor 4 GB-Xmx6Gfor 6 GB-Xmx8Gfor 8 GB
- Leave the rest of the JVM arguments unchanged, click Save, and then start the game.
👉
NOTE: If the launcher uses megabytes instead of gigabytes, remember that 1 GB is about 1024 MB (for example, 4 GB is 4096 MB).
Allocate More RAM in the CurseForge App
- Open the CurseForge app.
- Click the gear icon (Settings) in the lower left corner.

- Go to the Minecraft tab in the settings.
- Under Java Settings, find the Allocated Memory slider.
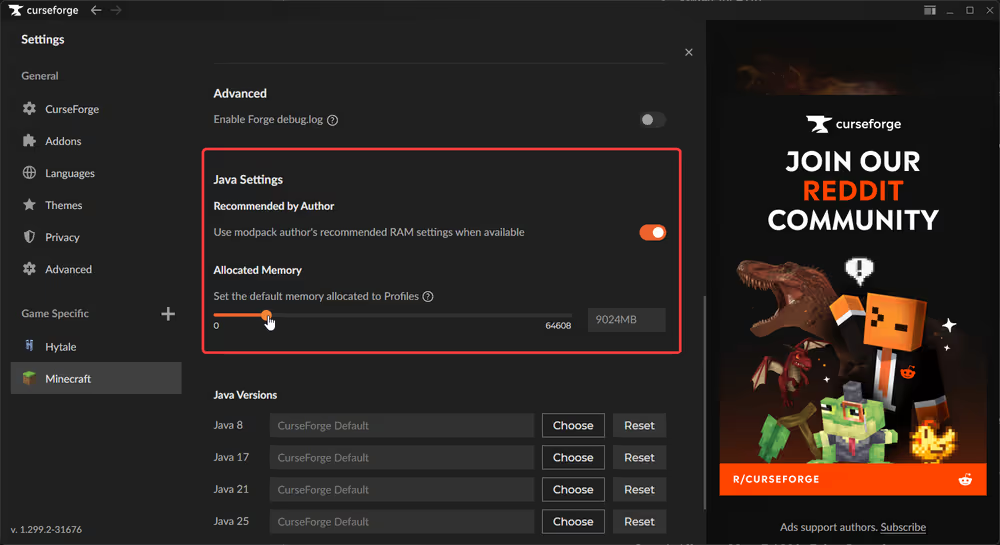
- Move the slider to the amount of RAM you want to give Minecraft (for example, 4096 MB for 4 GB, 6144 MB for 6 GB, 8192 MB for 8 GB).
- Close the settings window - your changes save automatically.
- Start your modpack or instance again to use the new RAM allocation.
💡
TIP: For typical modpacks, 4–6 GB is usually enough; very large or expert modpacks may run better with 6–8 GB if your PC has enough RAM.
Allocate More RAM in Prism Launcher
- Open Prism Launcher.
- Click Settings on the upper navigation bar and open the Java tab.
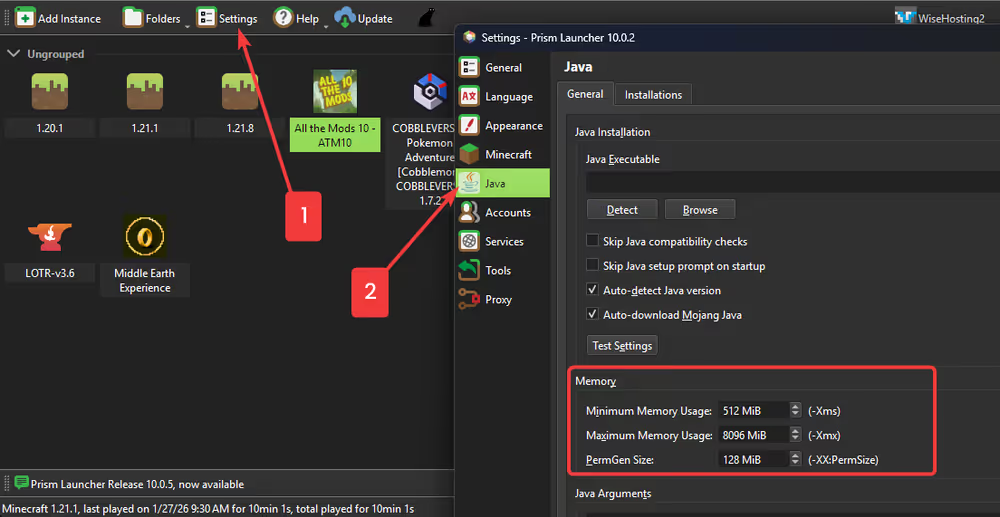
- Adjust the Minimum memory and Maximum memory values (in MB) to the amounts you want, for example:
- Minimum:
4096, Maximum:8192for 4–8 GB - Minimum:
6144, Maximum:9216for about 6–9 GB
- Minimum:
- Click Close to save, then launch your instance.
👉
NOTE: Very high allocations (for example, 12 GB or more) can sometimes make Java unstable. Stay within a reasonable range unless a specific pack recommends otherwise.
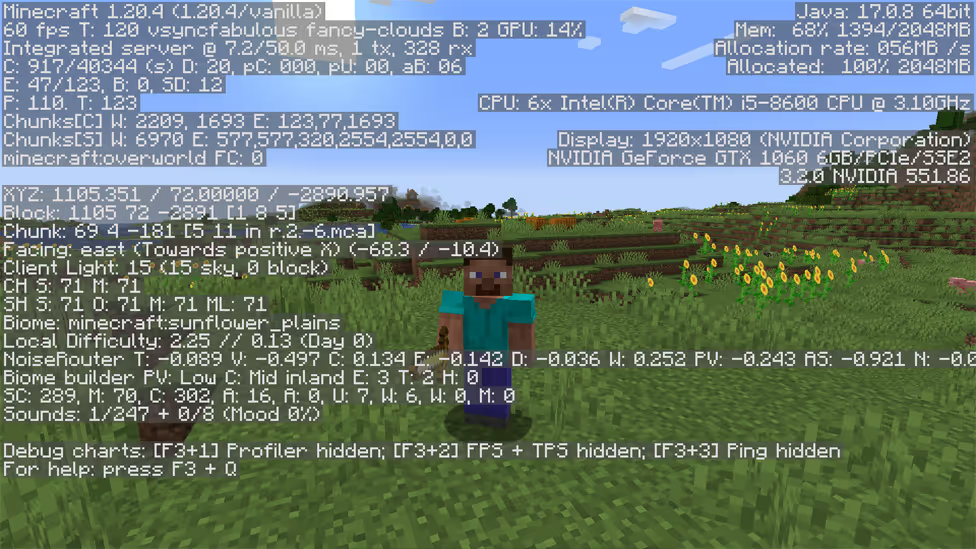
Verify Minecraft Is Using the New RAM
- Start Minecraft with the profile, modpack, or instance you just edited.
- Join a world or server.
- Press F3 (or Fn + F3 on some laptops) to open the debug screen.
- Look for the Mem line in the top right; it should show a higher maximum value that matches what you set (for example, around 4000–8000 MB instead of 2000 MB).
If the game stutters more after increasing RAM, you may have allocated too much and starved your system. Lower the value slightly and test again.
🧑💻
If you still require assistance, please get in touch with our support team by opening a ticket or by joining our community Discord server.


