
Mods add new content, mechanics, and features to your Minecraft server, but they need to be kept up to date to stay compatible with your server version and other mods in your setup. Running outdated mods can cause crashes, bugs, or conflicts with newer mod versions.
This guide covers how to update mods using the Game Panel and how to do it manually by replacing the mod file directly.
⚠️
IMPORTANT: This guide requires a Forge, Fabric, or NeoForge server. Vanilla, Paper, and Spigot servers do not support mods.
How to Update Mods
You can find updated mod files on Modrinth or CurseForge. Alternatively, you can download the mods after deleting them through the Game Panel.
- Head over to the Game Panel and stop your server.
- Navigate to Files and open the
modsfolder. - Find the old version of the mod and click the three-dot menu next to it, then select Delete.

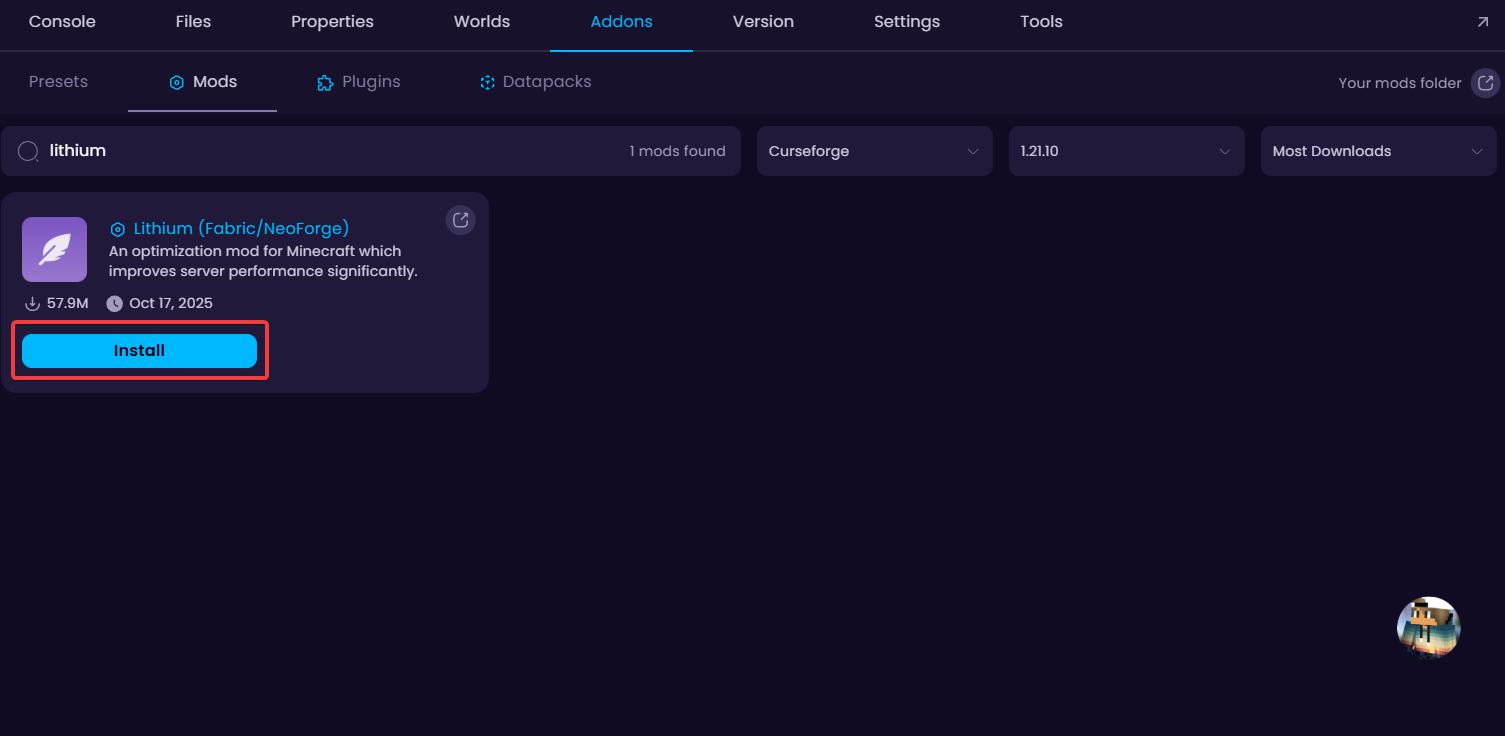
- Navigate to Addons → Mods and search for the mods you just deleted and click on Install.
- Start your server and monitor the Console for any errors.
💡
TIP: If your server crashes after updating a mod, check if any of its dependencies also need updating. Mod pages on Modrinth and CurseForge list required dependencies under the "Relations" or "Dependencies" section.
⚠️
WARNING: Never run two versions of the same mod in the mods folder at the same time. Always delete the old
.jar before adding the new one to avoid conflicts.


