Plugins are server-side modifications that use existing features and code in the game to add new functions. Since they don’t make any changes to the base game, your players don’t need to install the plugins to their client-side or make any changes to their game to join the server, as you would do with mods.
Why is my Plugins tab locked?
Plugins only work on server types built for them. If your Plugins tab is greyed out with a lock icon, your server is currently running a type that doesn't support plugins (like Vanilla, Fabric or Forge).
To unlock it, switch your server to Paper, Spigot, Purpur, or Folia, a fork of Paper. If you're running Vanilla, Forge, Fabric, or another mod-based type, the tab will stay locked until you switch.We recommend Paper for most servers. Here's how: How To Change Your Minecraft Server Version
Back up your files first. If you're switching just to unlock the Plugins tab (e.g., Vanilla → Paper), keep the same Minecraft version so your world stays compatible.
Unlike mods, most plugins are version flexible to an extent. This means that in some cases you can continue using a plugin even if it hasn’t been updated to the latest version of the game yet.
How To Install Plugins from the Plugins Tab?
- Head over to the Game Panel and stop your server.
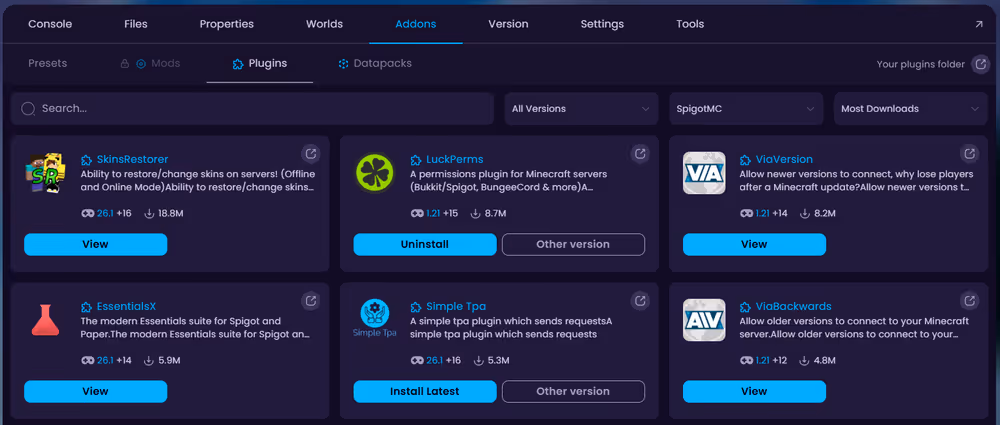
- Navigate to the Addons → Plugins tab and download the plugins of your choice to the server.
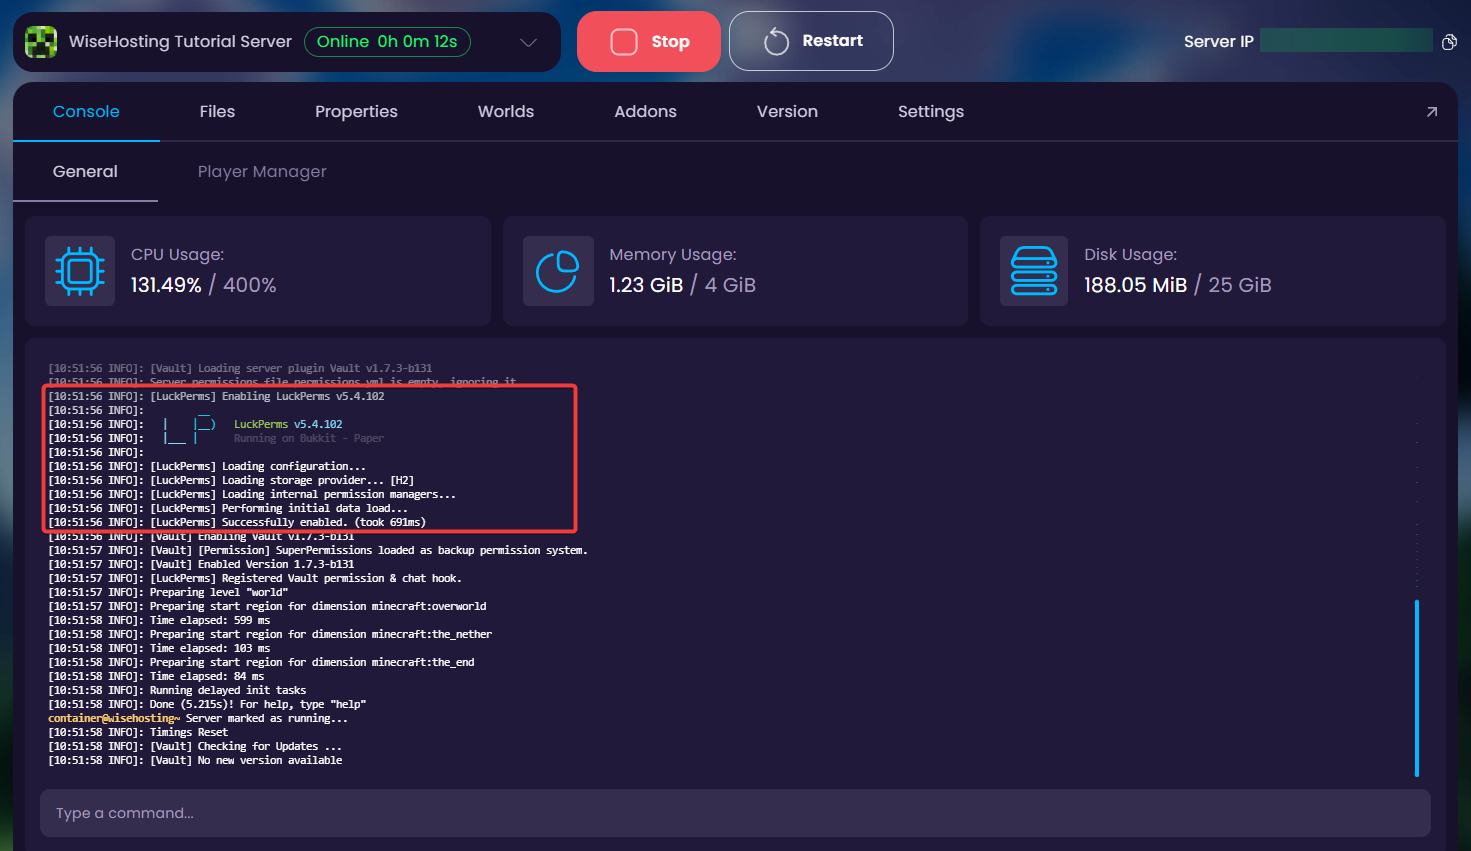
- After installing the plugins, start your server back up and check the console to make sure the plugin(s) you added loaded up correctly with the server.

How To Install Plugins Manually?
To install plugins manually you'll need to install the plugin.jar into your computer. You're able to browse thousands of different plugins on SpigotMC and Modrinth.
- Head over to the Game Panel and make sure your server is not running.
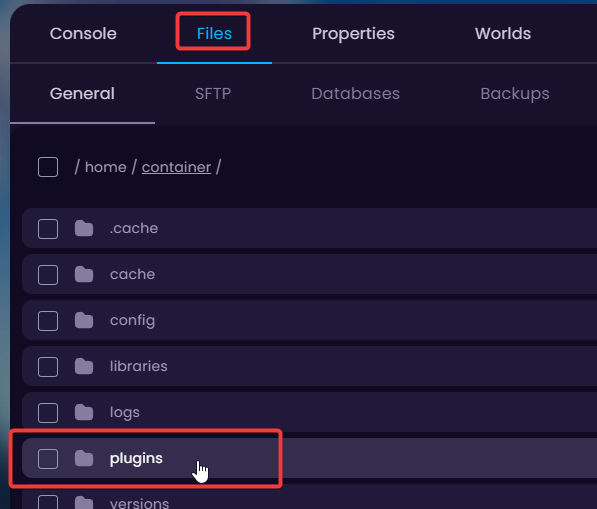
- Navigate to the Files tab and open the
pluginsfolder.
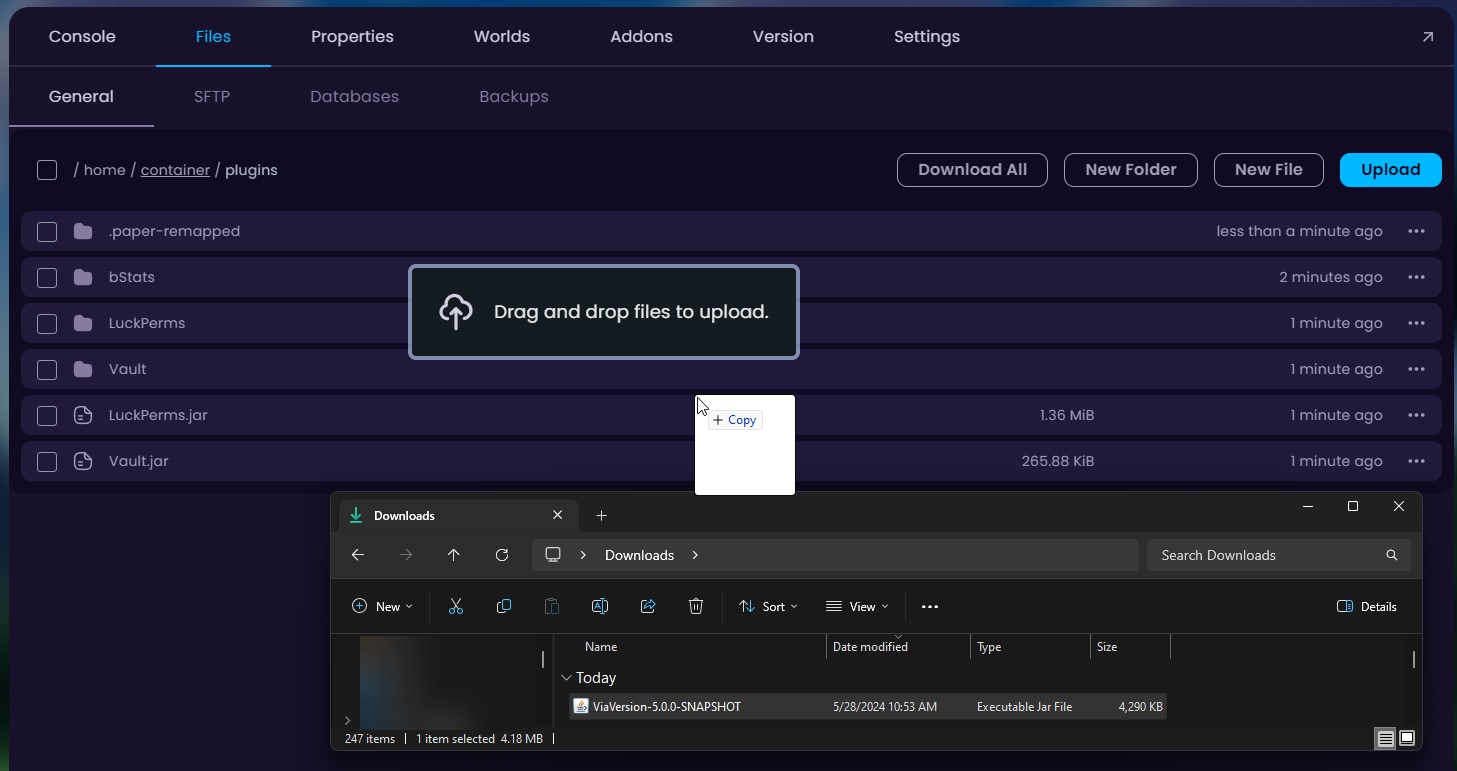
- You can drag-and-drop the plugins from your computer to this folder.
- Start your server and check the console to make sure your freshly installed plugin started up.